Customer Services
Copyright © 2025 Desertcart Holdings Limited


♻️ Elevate your kitchen game with smart, sleek waste management!
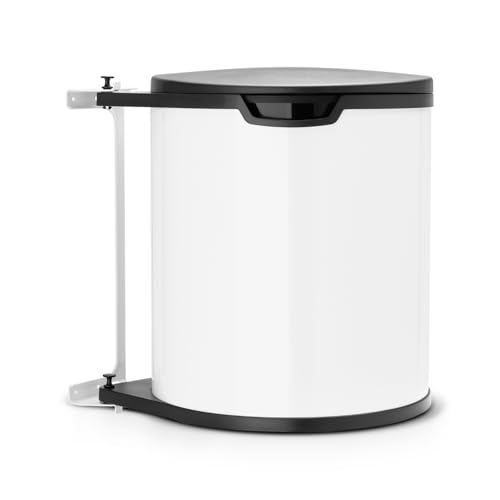
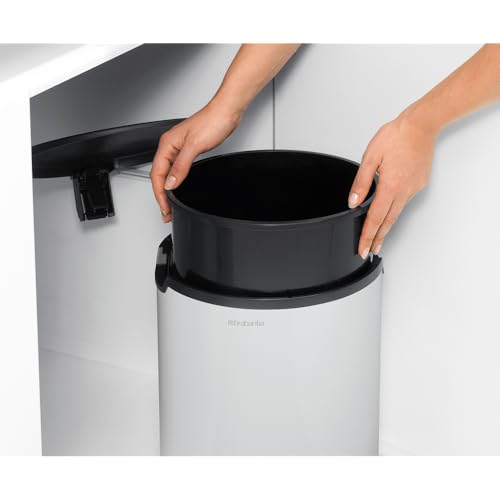
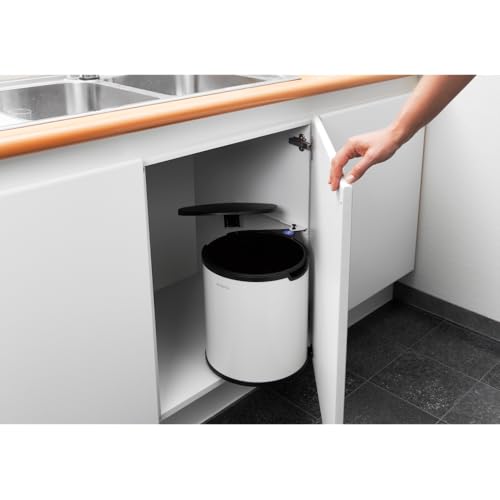
The Brabantia Built-in 15L Inside Cupboard Bin is a space-efficient, easy-to-mount waste solution designed for under-sink or cupboard use. Featuring an automatic lid that opens with your door and a removable inner bucket for effortless cleaning, it keeps your kitchen tidy and stylish. With a discreet design that hides bin bags and a 10-year guarantee, it’s the perfect blend of functionality and durability for modern homes.


| ASIN | B000MRRKG8 |
| Batteries required | No |
| Best Sellers Rank | 90,785 in Home & Kitchen ( See Top 100 in Home & Kitchen ) 192 in Under Kitchen Counter Bins |
| Customer Reviews | 4.5 4.5 out of 5 stars (477) |
| Date First Available | 11 Aug. 2004 |
| Dishwasher safe? | No |
| Finish types | Painted |
| Included components | Trash Can & Lid, Bracket, Fixtures & Fittings, Instructions, Liners |
| Is assembly required | No |
| Item model number | 428081 |
| Item weight | 2 kg |
| Product Dimensions | 29.21 x 29.97 x 34.8 cm; 2 kg |
J**N
Good quality item
Confusing instructions for me. So had to get help to fit it. Works as well as I expected, as I've already had this 1 before. Great the lid opens okay Good value, good quality item, a good name
S**K
Smart and functional
This bin does exactly what it says on the tin. Smart and functional.
K**D
Great bin for under the sink, good size and feels study
This is a great little bin, it's small enough to fit under the sink but still big enough that it doesn't need to be emptied too often. We are a household of 2 and probably fill 1.5 of these a week which isn't excessive. It was a quite fiddly to fit but then feels really secure and high quality now that it's done so that's forgiveable. The one downside is the lid, it never went on very securely in the first place and now has basically given up and fallen down the back of the cupboard but that's not a big problem in my opinion as the bin is shut away in the cupboard anyway. Overally I'm really happy with this bin as it's a great space saver, feels good quality and sturdy and isn't too tiny as a lot of under sink bins can be.
L**E
High quality, well designed product
Really nice quality as you'd expect from Brabantia. Be careful when fitting to really take your time so that everything fits perfectly. After the first stage in the instructions where you fix the main bracket to your kitchen unit I'd recommend temporarily attaching the bin unit to the bracket so you can check the positioning of the bit that screws to the cupboard door and the level of the arm which the lid attaches to. Also check that the part that attaches to the cupboard door clears the kitchen unit ok when closing the door fully, I had to adjust this slightly to be perfect. The lid closes tightly every time. Great design as the weight of the bin is not on the door at all. £35 is a bit pricey but you get what you pay for. Recommended.
R**L
Excellent bin
I had to replace a cheap plastic one that fell to pieces. This one is excellent but it didn't quite fit the cupboard size. I knew this when I bought it but as it was only about 3mm too big I reckoned I could get around the problem. Well, I could and did but this is not easy for the average DIY person. I really don't understand why Brabantia don't modify the product to make it suitable for a standard 400mm cupboard unit. If I can do it in my garage, I'm sure they can do it.
J**A
I am delighted but installation was a bit fiddly.
Now that it is installed I am delighted. The door opens so I can easily drop waste in without making the lid dirty. It is very easy to change the bag which fits perfectly. However, installation was a little difficult. The instructions tell you to drill holes about 10 mm from the bottom of the cupboard. They do not realise that the chuck of a power drill will not allow you to drill that close. I realised that you do not need to attach the bin that near to the base of the cupboard, in fact I raised mine up 100mm which is more convenient height for the bin. This meant I had to do some careful measuring to accurately place the holes. I do have some experience and the tools to do this. Some people may not and need help.
C**1
Solid product, good size for a small kitchen.
Robust build. Instructions need reading several times as there is no wording accompanying the less-than-clear diagrams. Fundamentally simple system. I would leave the alignment and fitting of the door bracket to last - as the only part that doesn't naturally sit square to the cabinetry I am puzzled as to why Brabantia say it should be fitted much earlier on during the installation.
R**S
Neat and well made
Lovely well pleased
M**O
Capiente, solido, igienico ed esteticamente molto valido, assolutamente superiore alle tante pattumiere da incasso in plastica in commercio. Richiede un pò di tempo, attenzione e di precisione nel montaggio (leggere bene le istruzioni, occhio alle misure e allo spazio disponibile), ma il risultato è completamente soddisfacente. Consigliato.
G**T
SUPER achat , je ne regrette vraiment pas , bonne qualité , l'installation n'est pas hyper compliqué mais il faut être deux . Je recommande .
S**A
Produit de qualité qui supporte bien le poids, pratique et efficace contre les odeurs sous l'évier.
J**S
Too expensive, size could be bigger
A**E
Macht was es soll und hat exakt die gleichen Maße wie der Vorgänger. Das hat man selten, dass man nach Jahren ein Produkt unkompliziert ersetzen kann. In unserem Fall nach 20 Jahren! Vielen Dank!
Trustpilot
5 days ago
1 week ago