Some deliveries may take a little longer than usual due to regional shipping conditions.

DOWNLOAD THE APP


Customer Services
Copyright © 2025 Desertcart Holdings Limited
DOWNLOAD THE APP


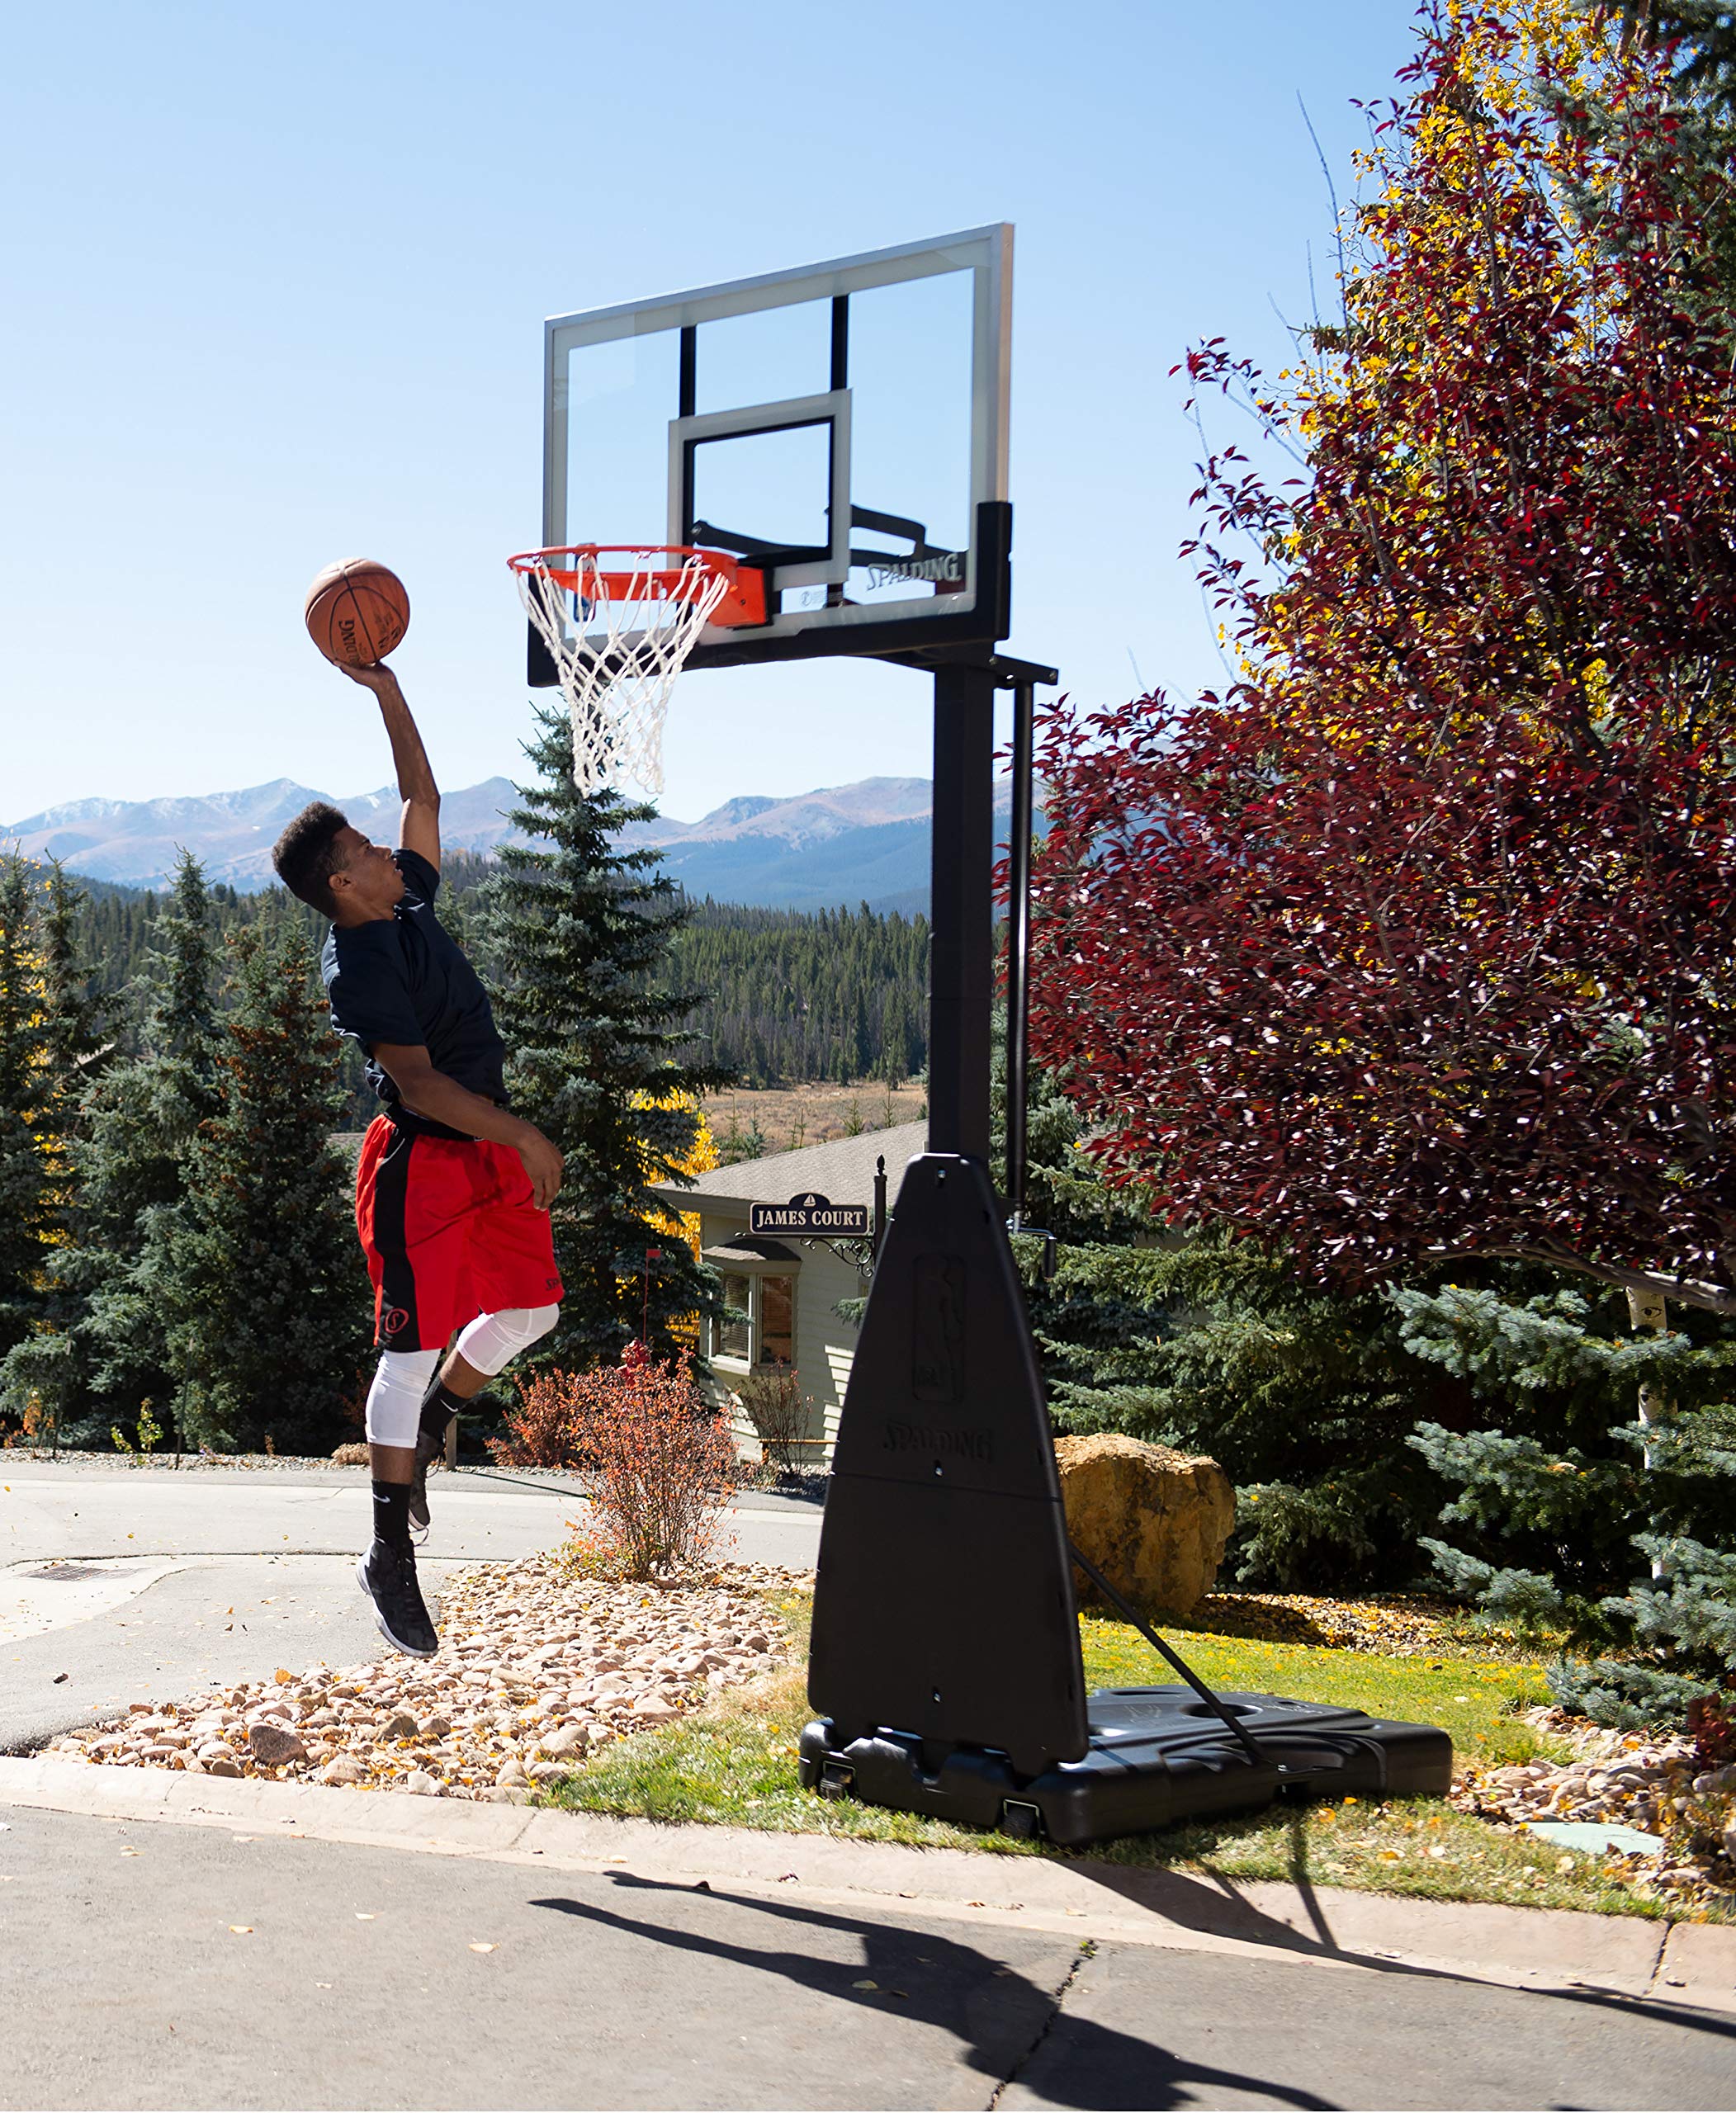
🏀 Elevate your game with pro-grade versatility and style!
The Spalding Screw Jack Portable Basketball Hoop features a 54" tempered glass backboard and a heavy-duty Arena Slam breakaway rim, delivering authentic professional-level play. Its innovative screw jack system allows quick height adjustments from 7.5 to 10 feet, accommodating players of all ages and skill levels. The base, fillable with 40 gallons of water or sand, ensures unmatched stability, while built-in wheels provide easy portability for spontaneous street or backyard games.


| Brand | Spalding |
| Material | Glass |
| Color | black |
| Item Weight | 190 Pounds |
| Indoor/Outdoor Usage | Outdoor |
| Special Feature | adjustable |
| Mounting Type | Pole Mount |
| Target Audience | Unisex Kid |
| Model Name | W13868 |
| Included Components | Wheels |
| Frame Material | Alloy Steel |
| Minimum Height | 7.5 Feet |
| Style | 2021 Version |
| Assembly Required | Yes |
| Maximum Height Recommendation | 10 Feet |
| Global Trade Identification Number | 00689344332383 |
| UPC | 689344332383 |
| Rim Size | 18 Inches |
| Manufacturer | Spalding |
| Item Package Dimensions L x W x H | 58 x 36 x 19.5 inches |
| Package Weight | 88.9 Kilograms |
| Item Dimensions LxWxH | 54 x 35 x 19 inches |
| Brand Name | Spalding |
| Number of Items | 1 |
| Part Number | 68454 |
| Size | 54" |
| Sport Type | Basketball |
L**A
Impressed with this goal
I’ll start out by saying this thing was not easy to put together. But, the final product is worth the trouble!The box that was delivered is huge and definitely takes two people to move. We knew going in to assembly that it would be a time consuming task. Thanks to other reviews and a YouTube video, we were prepared. For the first part my dad actually came over to help us as well. It was nice to have three sets of hands.It was really hard to get the poles together. You have to watch the orientation and then it really took some muscle to “bounce” the three sections together. Thankfully my husband is a tall guy and was strong enough to do it. He had to bring the pieces up quite high and slam them down on scrap wood to get them together. We used a rubber mallet early on to make sure everything was lined up.The backboard assembly was also a little tricky. We had one hex bolt missing from our packaging. Standard size so we decided to get from the hardware store instead of calling Spalding and waiting for one bolt. It matched the other perfectly. No big deal there.Getting the spacers in between the rack mounts and backboard also required some muscle to get in place. Thanks again to husband. Fishing bolts through the metal and the spacers was a lesson in patience.Once the backboard was on, things went much faster and smoother. We made a small mistake in mounting the rim. We forgot that for the glass backboard there was a foam pad and 4 additional spacers. Luckily we realized that pretty quick and fixed it.Rim went on just fine and well as the mechanism to raise and lower the backboard. One small thing to watch for - we accidentally had the outer tube orientation wrong when we mounted the rising mechanism. Not a huge deal but when we went to put the sticker on for rim height the little circle cutout was facing the pole instead of to the outside. You can still see the height sticker so - no harm.For the base - We bought the filler that Amazon offers where you mix it with water to form a nice poly fill material. It resists freezing so we decided to go that route instead of adding antifreeze to the water in the base. However this pole and backboard are SO HEAVY we had a near scare with it tipping before we filled the base. So, just to be sure it was safe we put a couple 50 pound sand bags on top of the base also. I’m sure it’s overkill but...We also decided personally to not put the backboard pads on. My kids are too young to even get close to dunking and the way you have to attach those is to drill into the backboard. We skipped this for now. Maybe once we have teenagers we will add the pads.Assembly was complete in what I will estimate as about 8-9 hours. We did it over the course of 3 days. Took our time and double checked the directions. Also had some interruptions. So I’m sure it would be less for many people. It definitely requires two strong adults to get done.We found that the instructions weren’t that bad. Some reviews said they were awful and while they could be a little more clear for some steps overall we didn’t have problems. Just read it through more than once and go slow. Double check things.Now for the fun part - it’s done so how does it play?We are very impressed with this goal. It is rock solid! With many portables you have a lot of wiggle and vibration after a shot. Not with this bad boy! The ball comes off the glass so nicely also. My family has enjoyed this goal a lot so far. It’s very easy to raise and lower the backboard so both my kids can have fun shooting.We have only had it fully assembled for a day so I will update this review once we spend more time on the goal. But so far - very pleased and all the time spend assembling it was worth it!
U**E
Pleasant surprise
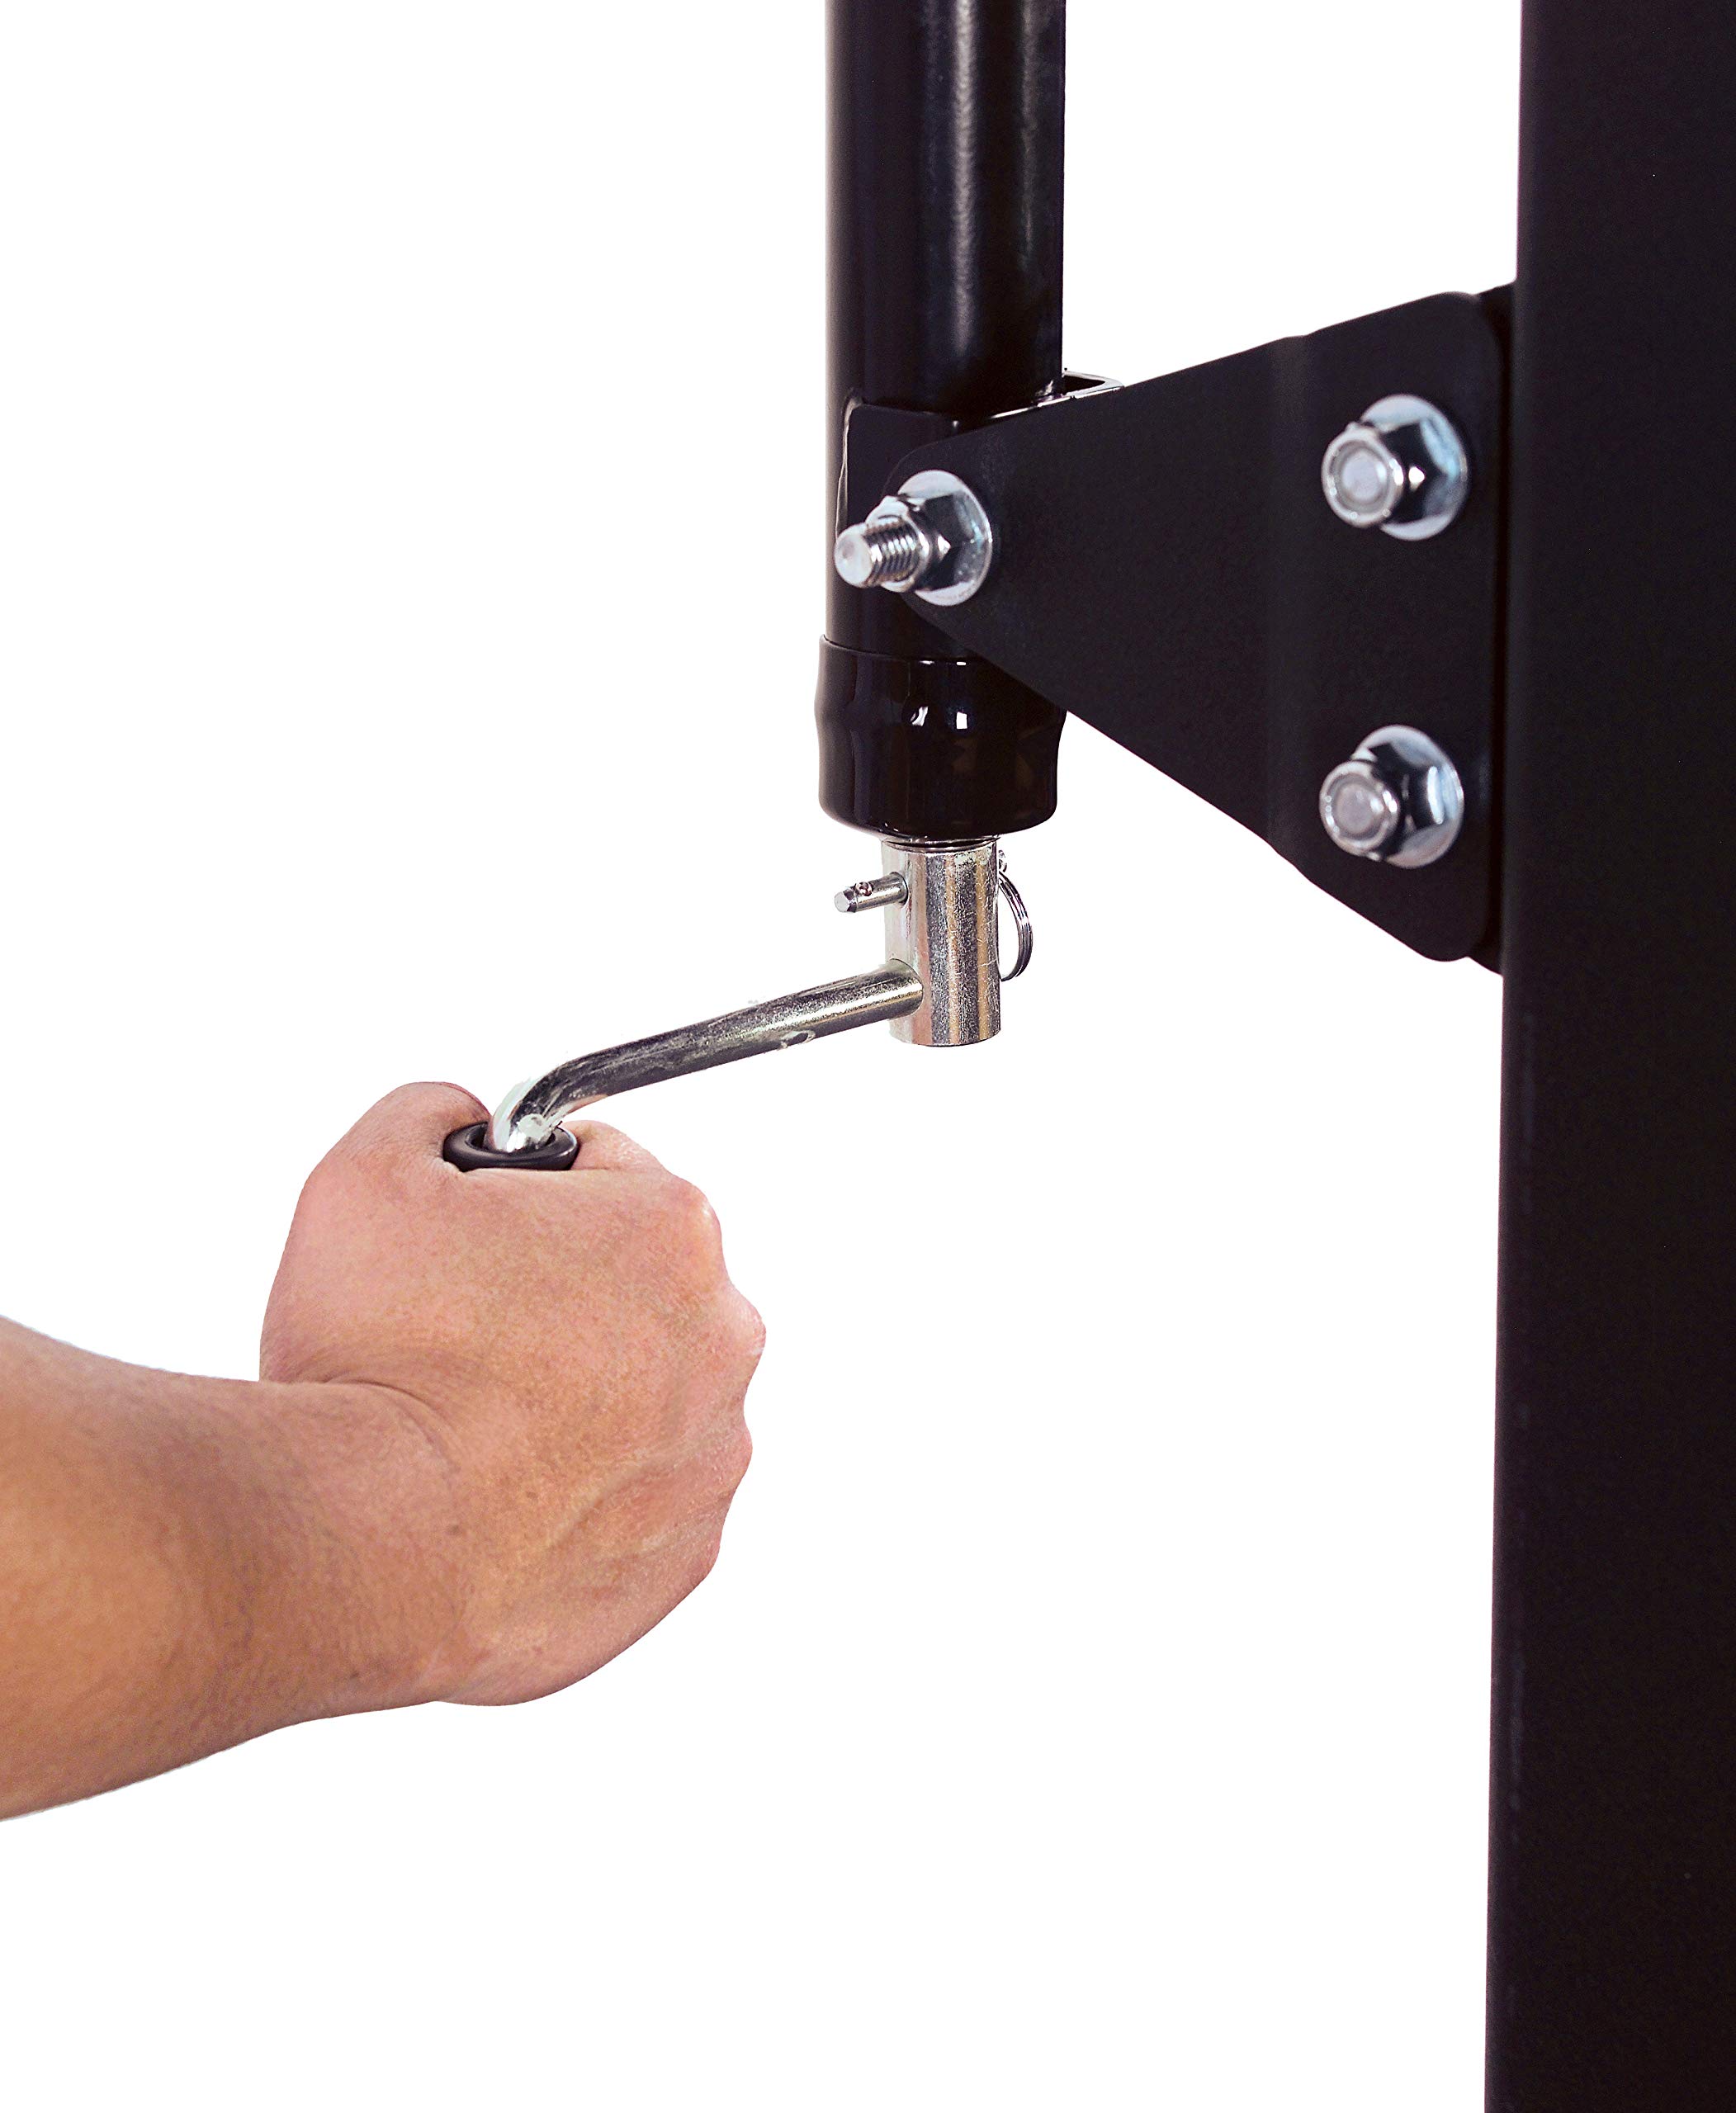
My biggest fear in buying this hoop for my son was that I'd teach him a few new bad words if he helped me assemble it. I am NOT "handy" and have "learned" over the years that instruction manual authors and illustrators undergo special training so they can convey ambiguous and deceptive directions.But the assembly was such a pleasant surprise and the end product so awesome, I had to post a review (my first ever, for anything).The end product is attractive and solid. We live in the Midwest and I was afraid the large backboard would act like a sail on windy days. Being able to lower the backboard when not in use is a big plus and it's very easy to do. We filled the tank with water and, as per the directions, 2 gallons of antifreeze since we live in a cold climate. I believe that will work fine, but the day after final assembly the weather forecast called for 40-50 mph gusts. So being a bit of a ninny, I put an extra 150lbs of ballast (bags of rock salt) on top of the tank. The hoop is solid as a rock both in the wind and during play.Assembly was pretty painless and took about 5 hours altogether. Contrary to what I've come to expect from instruction manuals, this one was pretty decent. A couple of assembly tips:1. Tools needed. I can't imagine trying to assemble this without a socket wrench set. Also, most of the time during assembly the pole will rest on sawhorses - make sure they are tall enough before you start (at least 38" high). You'll need that much clearance when the backboard is attached.2. The instructions advise to check that bolts fit smoothly thru their intended holes in case dried paint around the hole opening impedes that. Good advice. I encountered that issue in step A 11 when attaching the "elevator tubes". I had to use a rasp to SLIGHTLY enlarge two holes on the elevator tubes. Other than that things fit well.3. The parts themselves aren't labeled or numbered so it pays to use the instruction manual illustrations to inventory parts before attempting assembly.4. None of the 3 pole sections have "front" or "back" labels to indicate in which direction they should face once assembled. That's not an issue for the top or bottom poles - you can figure it out from the illustration. The middle pole orientation was a puzzle though. The instruction manual shows the two warning labels on the middle pole facing front (toward the shooter). But MY middle pole had a warning label on opposing sides of the pole (one in English, one French). I called Spalding customer service and after providing them with the instruction manual ID# (on front cover bottom right) they went to the illustration in the manual that confused me and were able to help immediately (I was pretty impressed with that).5. In assembly steps where the manual warns "this step requires two adults", that's usually correct. It's not just an issue of strength, most of those steps require 4 arms. Step A 5 is an exception. Kind of hard to explain, but bolting the pole to the tank requires ONE person to peer thru the hole in the bottom of the tank to find the corresponding holes which are INSIDE the pole. While doing that, the same person (I think) has to manipulate the tank till the holes align. The only analogy I can think of is the scene in "Apollo 13" where Kevin Bacon's character has to look thru a receptacle in order to dock the command vehicle and extract the "lem". If my wife and I had tried that one together, we'd be divorced by now.6. Also re step A 5, there are 3 holes in the depression on the tank where the pole is to be attached. But the instruction manual shows only 2 bolts (and holes) being used for that purpose. Given my instruction manual paranoia, I called Spalding customer service. They explained the third hole is meant to stay open - it allows rain water to drain thru the tank once the hoop is assembled (duh, should have been able to figure that out on my own).7. In several steps where bolts are used, the instructions clearly warn "STOP TIGHTENING NUT WHEN FLUSH WITH END OF THE BOLT". Be on the lookout for those steps cause the backboard is meant to be raised and lowered. In assembly steps with that warning, tightening the nuts beyond that point will probably impede movement.8. Step B 3 is where the rim is attached to the backboard. I found that illustration a bit confusing. I had the mistaken impression the rim was to be secured to the backboard with the same 4 bolts used to attach the rim bracket to the backboard in the prior step (B 2). Not so. The rim fits OVER the heads of those 4 bolts and is attached to the backboard only by the bolt (and washer and nut) that runs thru the MIDDLE of the bracket.I found one part to be missing from the package - the center plastic guard that attaches to the bottom of the backboard. Customer service shipped it right away. Other than that, everything was there. Also, there were no extra parts left over (as I think was alluded to in another review).Good luck and enjoy!
Trustpilot
1 month ago
2 months ago