We remain fully operational. Our teams are working around the clock to ensure your deliveries continue safely.

DOWNLOAD THE APP


Customer Services
Copyright © 2025 Desertcart Holdings Limited
DOWNLOAD THE APP
🌬️ Elevate your drive with air so fresh, you’ll never want to roll the windows down!
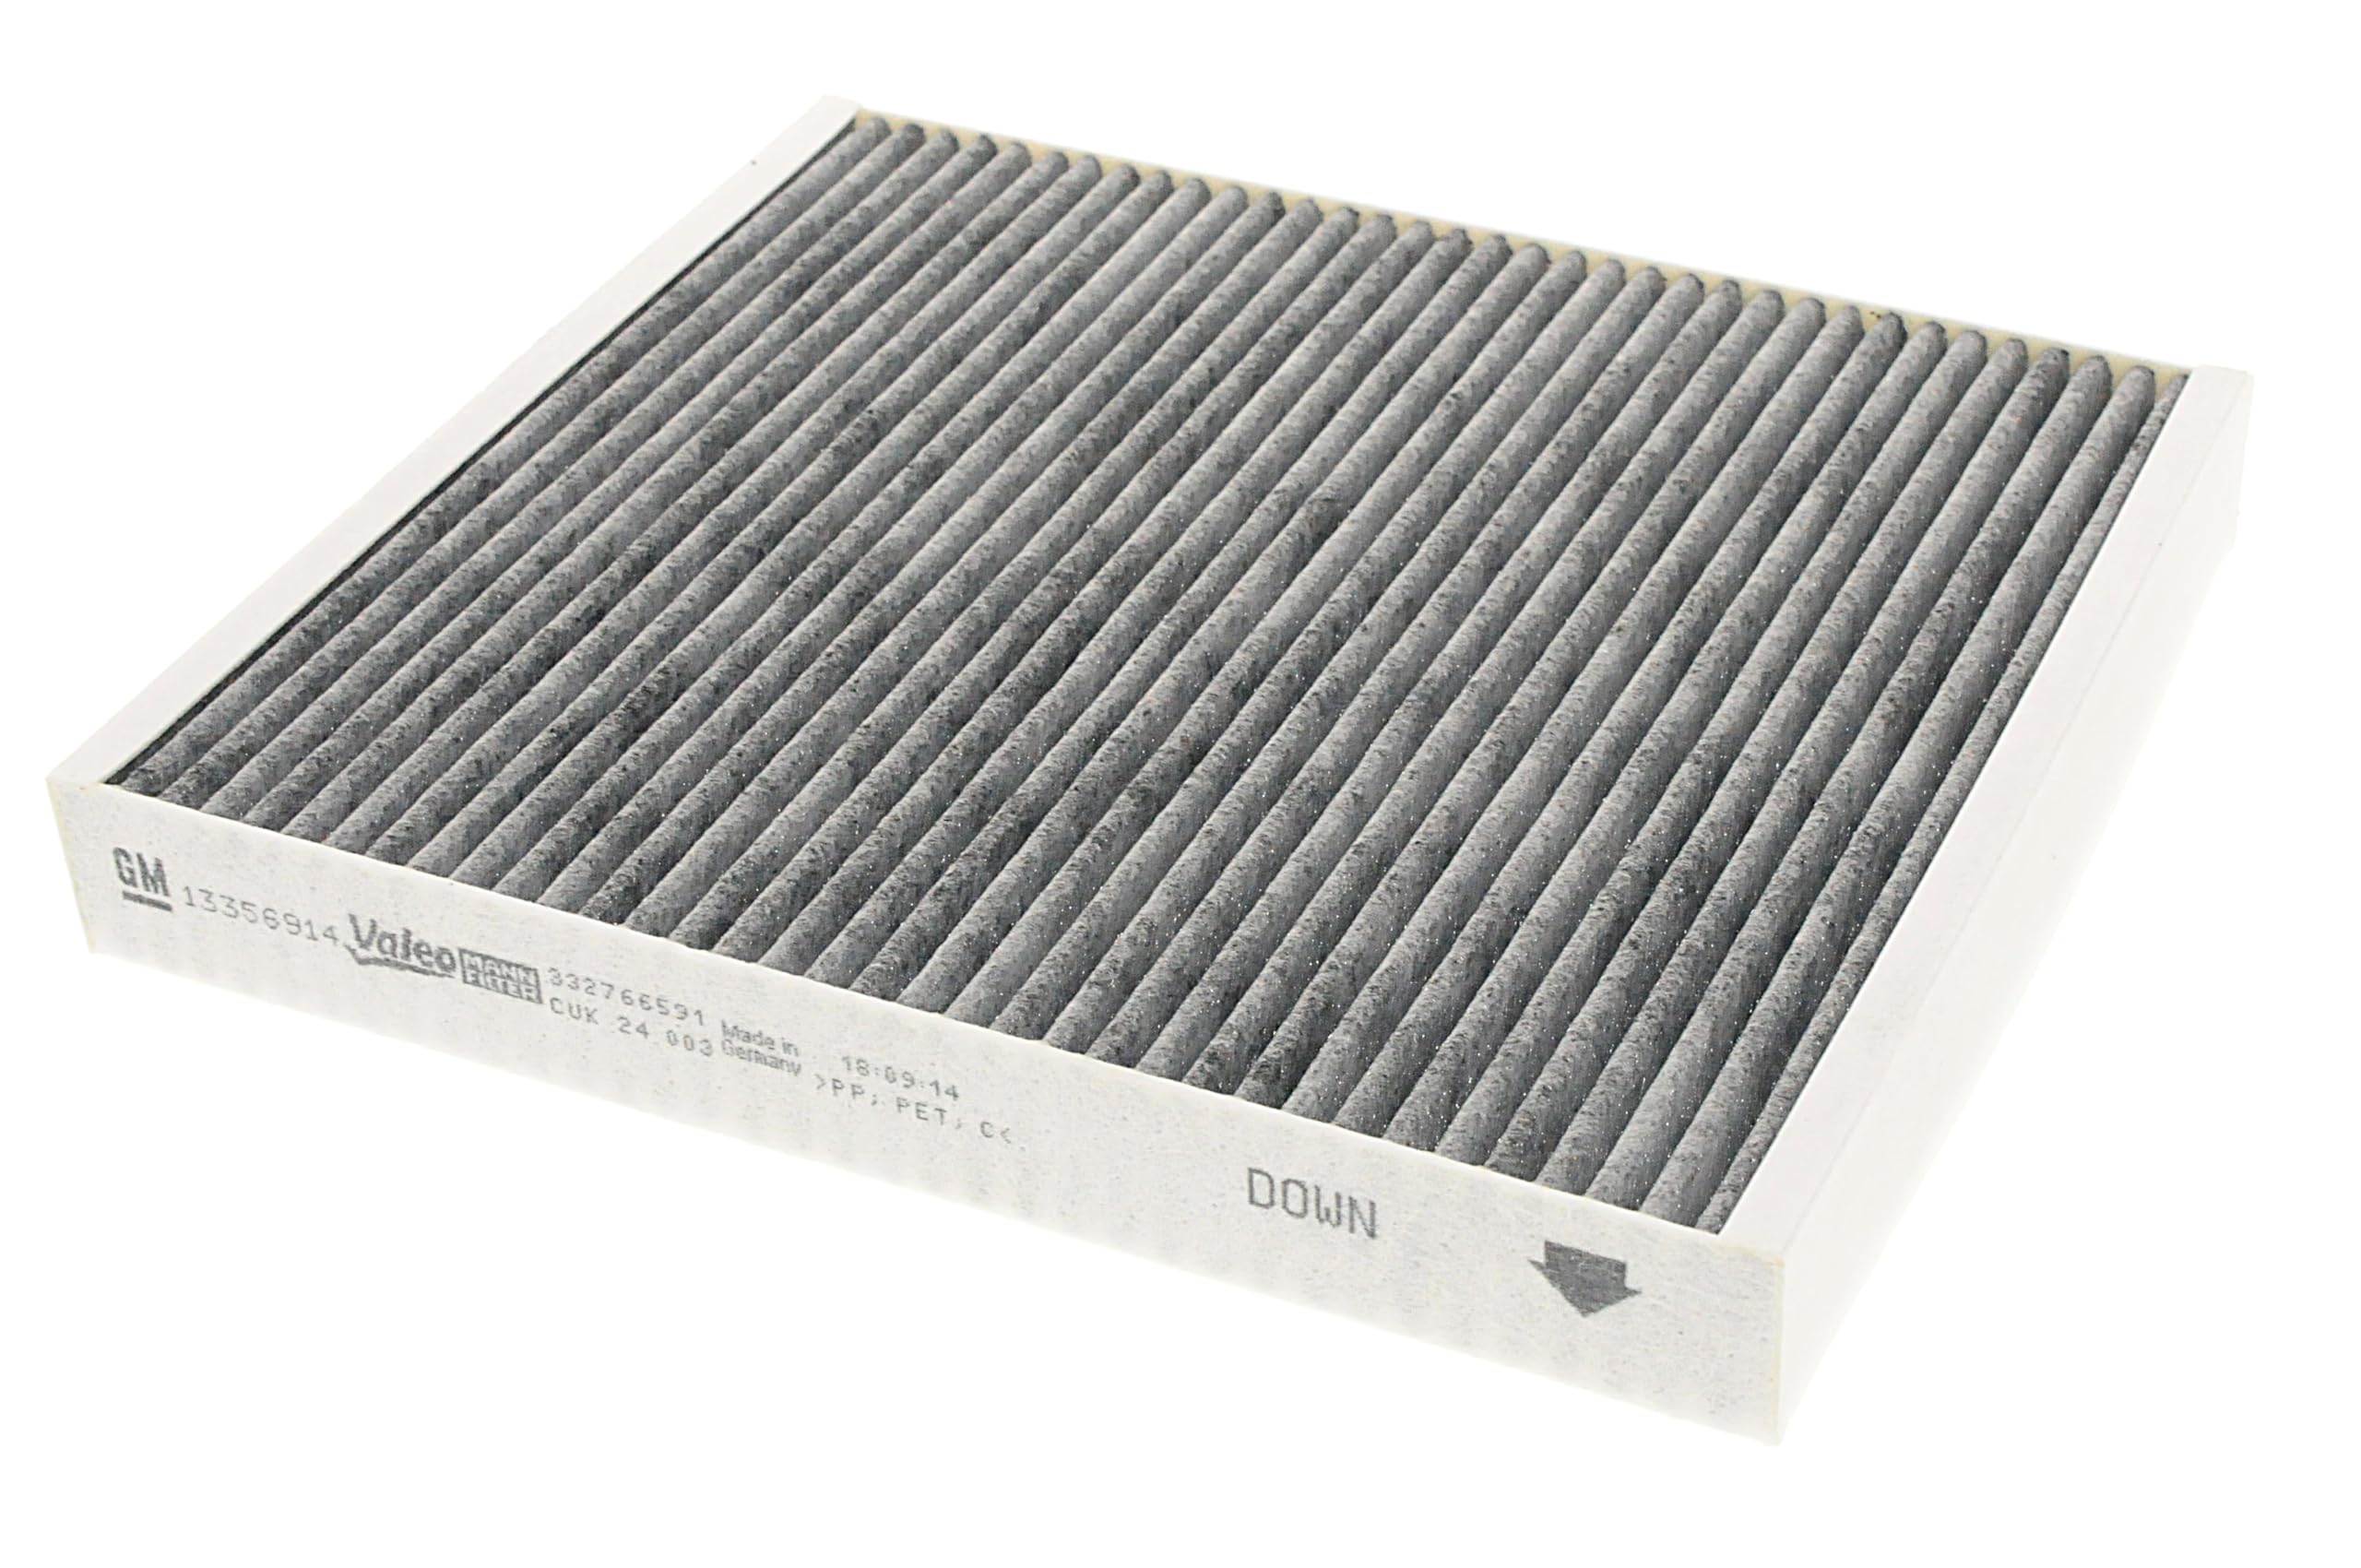
The ACDelco GM Original Equipment CF184 Cabin Air Filter features a pleated, multi-layer polyester construction designed to enhance airflow while effectively capturing allergens and odors. Compatible with various air cleaners and backed by a 24-month unlimited mile warranty, it delivers OEM-quality filtration for a healthier, more comfortable driving environment.


| ASIN | B00KUL790S |
| Air Filter Construction | Pleated |
| Best Sellers Rank | #24,510 in Automotive ( See Top 100 in Automotive ) #79 in Car Cabin Air Filters |
| Brand Name | ACDelco |
| Common Applications | Allergen Reduction, Odor Reduction |
| Compatible Air Conditioners | Inventor Chilly 9000BTU |
| Compatible Devices | Air Cleaner |
| Customer Reviews | 4.8 4.8 out of 5 stars (1,149) |
| Global Trade Identification Number | 00707773970454 |
| Included Components | Cabin Air Filter |
| Item Dimensions L x W x Thickness | 25.4L x 25.4W x 3.3Th centimeters |
| Item Type Name | Cabin Air Filter |
| Item Weight | 0.62 Pounds |
| Manufacturer | ACDELCO |
| Material Type | Polyester |
| Model Number | CF184 |
| Number of Items | 1 |
| Product Grade | New |
| UPC | 707773970454 |
| Unit Count | 1.0 Count |
| Warranty Description | 24 Month / Unlimited Mile Limited Warranty on parts sold on or after 04/01/18. (Parts Only) Please see ACDelco.com for more details. |
K**A
منتج اصلي
A**D
Excellent product
Excellent product
L**T
Good
Good
E**R
Perfect and original
Used for Impala 2015
O**D
ممتاز جدا
J**A
Excelente calidad
T**Y
Original product, easy installation. Fits all Astra K 2016 up to 2019. Not too sure on 2020 PSA Astra.
F**T
This is CF184, it can be replaced with CF185 and CF209. CF185 is almost similar to it but CF209 is different, that comes with activated carbon but does not filter out allergens. So make your choice wisely. This is genuine OEM, so it matches the factory specs exactly. No trimming, no forcing, just a clean snap-in replacement. Features a compound, non-woven material with three distinct layers. Outer layer traps large particles like dust and pollen. Middle layer captures finer contaminants such as smoke and smog. Inner layer adds structural integrity and stability. Designed to maintain optimal air circulation while filtering out pollutants. Helps block pollen, mold spores, and airborne irritants which is great for allergy sufferers. Improves cabin air quality by keeping bacteria and odors from building up in the HVAC system, making your driving experience fresher and healthier.
D**N
Amazon, and other sites, incorrectly claim this does not fit a 2017 Chevy Volt, despite this exact part number being called for in the owner's manual. For anyone else confused by this, I can confirm this does in fact fit my 2017 Chevy Volt.
M**N
This looks to be a much better quality filter than the OEM one I removed from my 2019 Camaro SS. After 2 years of ownership I decided it was time to change this filter, as the A/C is starting to smell a bit at startup, and was I ever surprised what the original filter looked like. Not terribly dirty, but there were small pieces of debris that somehow got into the intake system, luckily caught by the filter. And I baby this car, keeping it as clean as possible! This new filter has a charcoal layer where the original did not, and the original filter was definitely more flimsy than this new one. As for the installation, yes it is more difficult than it should be, but not impossible. Pulling the glove box down which requires both sides to be dislodged from the edges, was not easy at all. I decided to use a large-handled, 12" crescent wrench wrapped in a thick, micro fiber cloth (the handle, not the head), carefully wedged between each of the ends of the glove box and the dash as my pry bar. It took significant effort to get each side loose, as you must bring each retention/pivot pin on the glove box out of the dash where it resides, so that the glove box can be dropped down low enough to access the cabin filter. Having a pry bar made this so much easier and took much less effort than trying to muscle it by hand. Just protect the dash with a soft cloth or towel so you don't scratch or damage the plastic of the dash or glove box. I'm no pro wrestler, but still I figured I could probably get it loose just by hand. Wrong again! Just have a suitable pry bar ready and it'll be so much easier and quicker. One note while working to release the glove box, there is a tension cord on the outer right hand side that needs to be slipped out of place before the glove box can be lowered much beyond it's normal travel. I waited until I had the glove box loose on both sides to undo this, so I didn't let it snap back behind the glove box and possibly damage anything. The roll up tension on this seems to be rather tight, so it definitely would snap if you let go of it, kind of like a high quality tape measure would if you pull it out and just let it go. Once the cabin filter location is accessible, it's just a matter of pinching both sides of the filter cover to release all 4 retention latches and remove the cover from the housing. It's all up in there a ways, so either have decent flexibility, or get someone who is somewhat flexible to help. It won't be the most comfortable job you've ever done, but it only takes a few minutes to do if you're prepared. Mine seemed somewhat loose and did not pose any difficulty at all to remove the cover. Actually made me unsure that the cover was securely latched when I reassembled it, but after testing it a few times I knew it wasn't actually going to come back off. Carefully pull out the old filter, and if you're worried about knocking all the dust and crap loose, because you likely will see a lot more than you think trapped in the filter, just have a shop vac ready to suck up as much of the loose dust as you can while removing the old filter. Also note the direction of installation, because it does have an arrow showing the direction it needs to go back in based on the air travel. Since this new filter will likely be more rigid than your old filter, it may take just a bit more force to get it back into place. Regardless, the filter doesn't seem to fit too tightly or anything, the final resting position is actually a bit roomy. Put the cover back on and check to make sure the latches are secure. This is where I found uncertainty in my car's filter cover, as it fit back together kind of loose and the corner latches never did really "snap" into place. Regardless when I gently pulled on the middle of the cover, it did not come off, so I knew it was secure. Once you are certain the cover is securely in place with the new filter all comfy inside, remember to grab that tension cord that is likely spooled all the way back up to the rear of the glove box area in the dash. Pull the tension cord down, and at the same time begin pushing the glove box back up into place. Several people have suggested wrapping a string or something around the tension cord as not to lose it, but I found that you'll need to be able to grab and pull it back into place anyways, and in my car I was confident it couldn't go anywhere after I carefully allowed it to reel up when I disconnected it. It'll take another bit of forceful effort to pop the retention/pivot pins of the glove box back into each side's pockets in the dash, but should be easier than the removal process was. Have the tension cord on the right side in hand, and be ready to slip it back into place as you bring the glove box back into position. Once everything is back into place with both sides of the glove box securely in position and the tension cord reconnected to the right side of the glove box, you can now consider this job complete! Enjoy you're new cabin filter for as long as it lasts until you have the pleasure of changing it again. If you decide you'd like to try a different filter, such as a scented version or otherwise, I hear this process isn't quite as difficult the second or third time around. Search the internet and YouTube for videos and additional details, as there are plenty of resources to help you with this task. I have heard mechanics and especially dealerships (or as I call them, stealerships) charge upwards of $100 or more just to change out this $15-$20 filter that you can easily do yourself if you have a bit of patience and about 10 minutes of time. Good Luck!!!
Trustpilot
2 months ago
1 month ago