We remain fully operational. Our teams are working around the clock to ensure your deliveries continue safely.

DOWNLOAD THE APP


Customer Services
Copyright © 2025 Desertcart Holdings Limited
DOWNLOAD THE APP
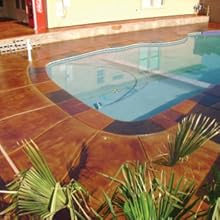
🎨 Transform your concrete into a masterpiece that lasts a lifetime!
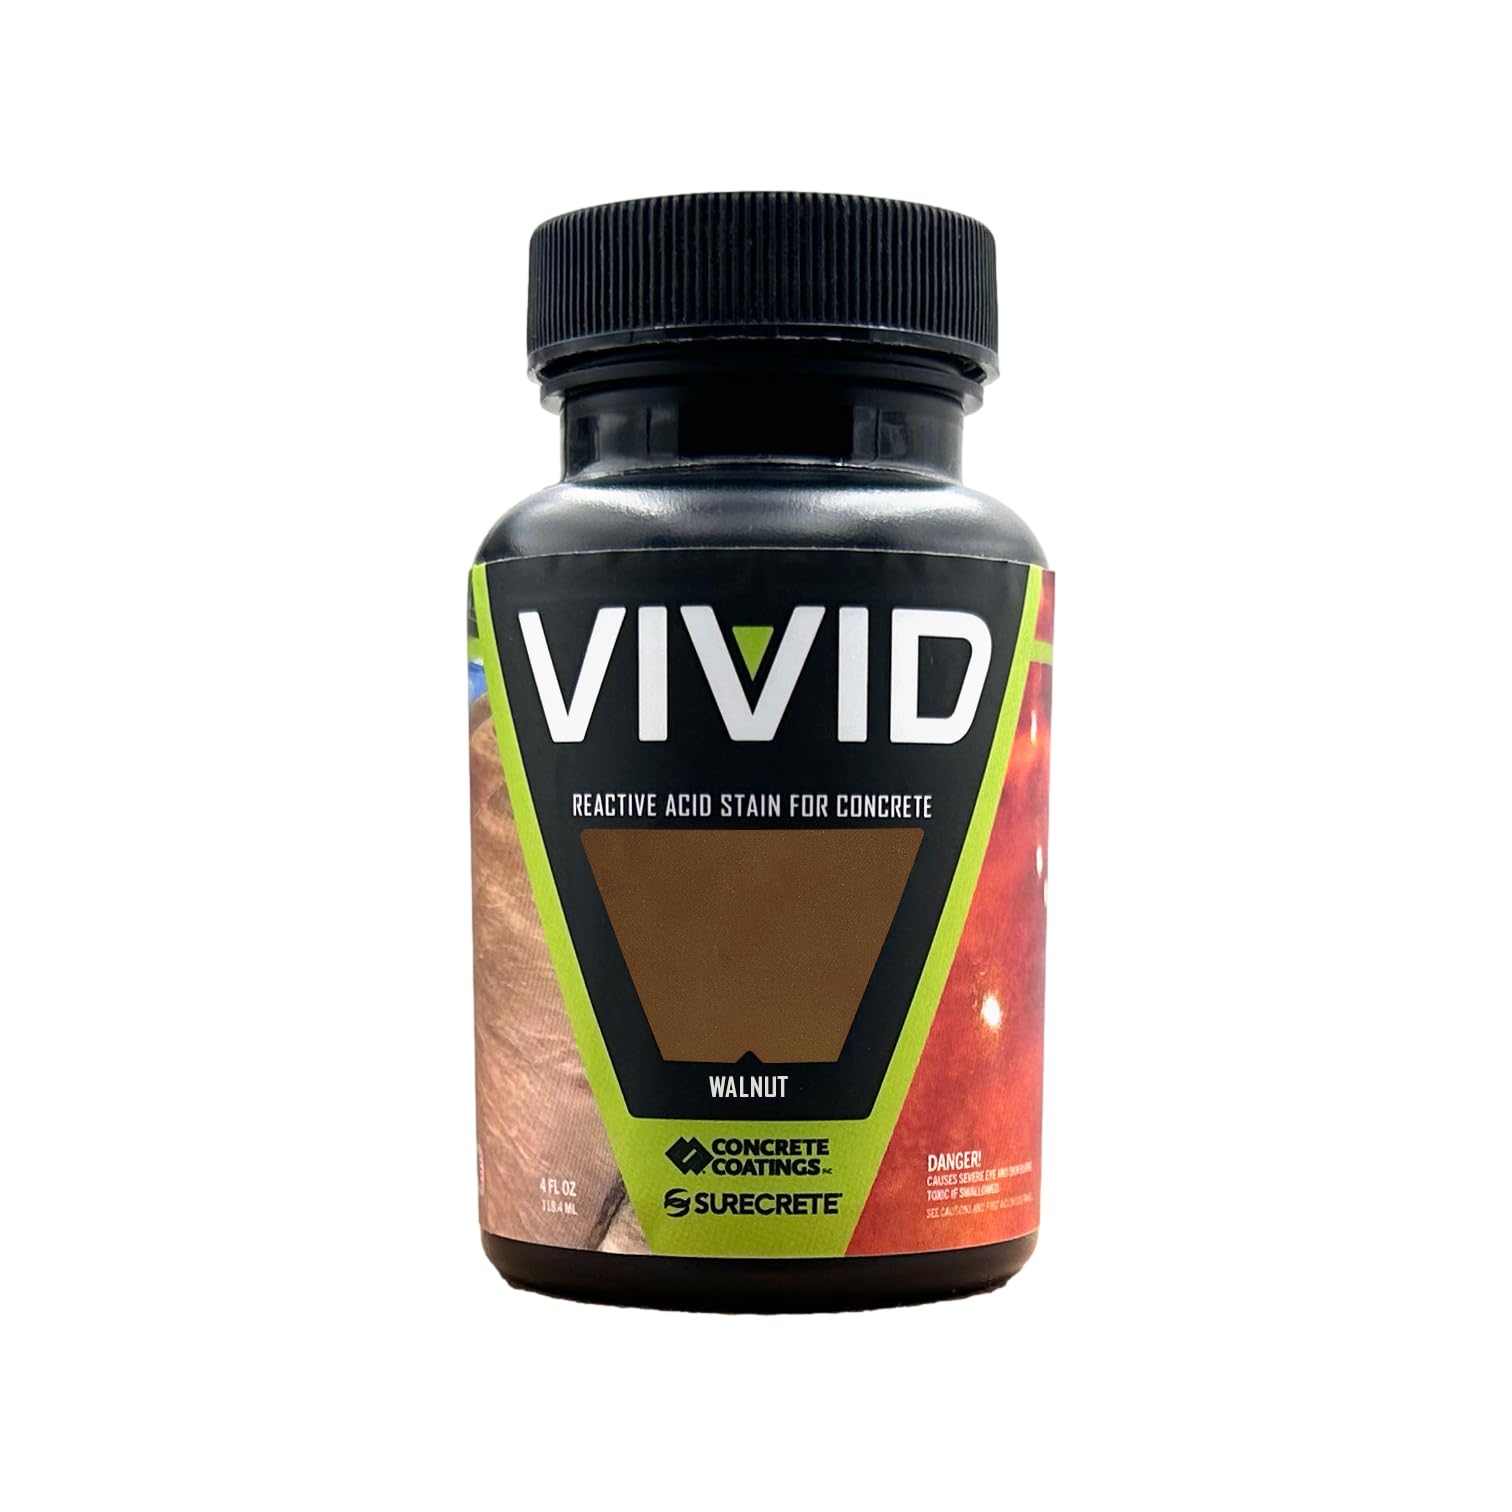
CC Concrete Coatings Vivid Acid Stain in Walnut is a professional-grade, chemically reactive stain that penetrates concrete to deliver a permanent, variegated finish. Designed for both indoor and outdoor use, it offers UV stability and durability against heavy traffic. Available in a 4 oz tester size, it’s ideal for DIY enthusiasts and contractors seeking a unique, long-lasting decorative concrete solution.


| Brand | CC Concrete Coatings |
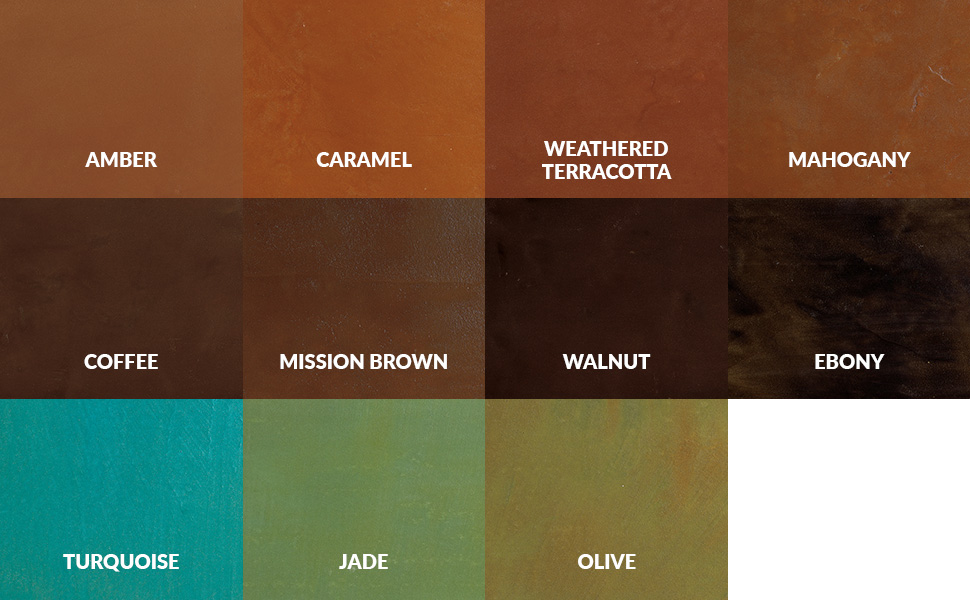
| Color | Walnut |
| Material | Stain |
| Model Name | CS-1000-4oz |
| Size | 4 Ounce Tester |
| Surface Recommendation | Concrete |
G**K
A GREAT PRODUCT..... DO YOUR HOMEWORK, AND PREP CAREFULLY.
Okay.....bear with me. The sales pictures of the results using this type of concrete stain are captivating, to say the least. I am no klutz, and have built and stained/finished high end furniture for over 30 years for a living. I understand materials and their application. WOW, who wouldn't want that "faux Marble" look that is shown when this stain is applied properly. For a couple hundred $$, you can have a million dollar floor, driveway, patio, or pool surround. We used it on a 25 X 30, NEW kitchen floor.....yeah, that IS a big kitchen. We process hundreds of pounds of vegetables, fruit, and butcher multiple deer, hogs, goats and chickens throughout a normal year....we milk a Guernsey and several Dexters and make 4 lbs of cheese a day. We wanted a DURABLE, WASHABLE, ATTRACTIVE floor. We chose "Coffee" because it mimicked the dirt color around here the best. I am going to try and write this to "add" to the Instructions and TDS, (Technical Data Sheets), that are available on the product. Most of the questions I ask, or information I pass on are "extra" to the actual application of the stain....THEY ARE CRITICAL FOR A QUALITY COMPLETION OF A PROJECT USING THIS STAIN. 1) READ THE INSTRUCTIONS.......... MULTIPLE TIMES. 2) READ THE INSTRUCTIONS AND TDS SHEETS.......MULTIPLE TIMES. 3) READ THE INSTRUCTIONS, AND WHILE YOU ARE READING THEM, RUN A COUPLE OF THE VIDEOS ON YOUTUBE SO THAT YOU CAN GET "ORIENTED" AS TO VARIOUS APPLICATION METHODS. 4) SO YOU DON'T FORGET ANYTHING....READ THE INSTRUCTIONS AGAIN. 5) GET THE COMPANY'S TECHNICAL SUPPORT PHONE NUMBER WHERE YOU CAN HAVE IT READILY AVAILABLE. 6) CONSIDER THESE QUESTIONS THAT THE MANUFACTURER DOES NOT ASK, OR ONLY TOUCHES ON VERY SUPERFICIALLY A) What is your concrete made of.....Ha,HA you laugh....it's made of gravel, sand and Portland Cement, Well, the only thing that concrete in various parts of the country have in common is Portland Cement. Sand and gravel will vary from city to city. Here in NW Arkansas, we have concrete plants on a creek or river that use washed and graded creek gravel and sand for their mix. 30 miles away, we have concrete plants that are far from a creek....but close to a lot of quarry-able limestone. They crush and grade limestone, and use it for both "gravel" and "sand". WOW, does that make some VERY strong concrete.....BUT....it is a completely different beast from smooth, washed creek gravel and sand. IT IS VERY HIGH IN REACTIVE CARBONATES....AND MAGNESIUM.... The creek mix is FAR,FAR less reactive to the stain. Can you find out the source and ask them what mix they used, or usually use when supplying a project in your area. B) How well is your concrete finished ??? How "tight" is the surface. Who was the finisher, and what does he remember about the mix and the pour. There are vast differences in texture and composition between lightly troweled and heavily troweled concrete. C) CONSIDER BUYING the stain sample kit sold by the company....BUT, one caveat. When we send out color samples to furniture customers, we stress over and over again that it is nearly impossible to get an accurate vision of a completed piece's color from a small, hand held, sample. We did not get the kit. We picked a color and understood that, good-or-bad, we would be "stuck" with the color it yielded on our floor. You may have a VERY,VERY easy go of it, and everything might fall into place with what you have to work with. BUT IF IT DOESN'T....can you live with less-than-expected results ?? D) How long has the concrete been in place??? Inside, or outside like a driveway/sidewalk/pool surround??? If it is outside.....and is older than 1 or 2 months, HOW ACIDIC is your rain??? Acid is the bane of this finish. It is really not a stain, but a reactive acid/chemical. The longer your concrete is in acidic rain, the less reactive the mix will be. TREATED LUMBER is treated with an acidic, metal mix. If you were to stain a slab that had been in place under an elevated, treated lumber deck that was open to the rain.....you would get the " ghosts " of the boards where the rain dripped off the deck, down onto the concrete. The reactivity of the concrete will depend on an interaction of these elements. After you have a general understanding of what you have to work with, you can begin to gauge how the stain will react, and guess how you should proceed. I did all the research I could, and read the directions and TDS sheets over and over....I watched all the YouTube videos.. I gave this stain a 5 STAR rating. It is fabulous. The company is excellent and responsive to questions. This stain is 2X better than what the Big Box, do-it-yourself stores will sell you. GO WITH VIVID....it is a great product.........HOWEVER....BE WARNED......My completed job was about a 3 STAR from what we " expected ". By the time I do my 3rd floor....I'll know all the ins-and-outs and what to look for. We followed all the directions....researched all the glitches......planned for the unexpected....but this is a totally different process, with its own set of rules. Here is a brief summary of our results. We picked coffee....."brown with a slight red hue"..... I used 2.5 gallons on 700 sq ft and there is not a hint of brown, let alone red. It is "black coffee" black. In fact, it is "espresso" black, with the mottling being various shades of gray. I will cut the stain by 1/3.....or maybe 1/2 and go with 2 applications if necessary in the future. We used it full strength. Our concrete was finished by " professionals", but rural Arkansas professionals.....the surface varied in tightness, and the stain took dramatically different on each gradient of "smoothness". It "fizzed" very heavily on some sections, and not-so-much on others. Our concrete is crushed limestone.....very high in Magnesium ( the black we experienced ???). Our slab has a 3" in 30 ft slope toward the back door to facilitate washing the floor and squeegee-ing the water out the door. If a slab is not perfectly level, you will have to be prepared to even out any material that tends to "run" and pool up along the lower part of the spray line. I will have some sort of sponge mop ready to spread the excess in a more even coating. A set of treated lumber stairs ( the slab was completed a year prior to erecting the room over it) left a "ghost" impression in the floor. NO PROBLEM, we are going to brick up a set of stairs on that spot....but do take note of that. My floor was dark, far darker and blacker than we were expecting. I have an 18" industrial buffer and we prepped the floor with a lot of TSP and GREEN pad scrubbing. After staining, we actually used a less abrasive RED pad to try and bump down the color. It did help, and it evened the color out somewhat. I want the marbled effect....but we had from near jet-black to medium gray. I used one coat of SUPER SEAL 20WB. Great product. About 2 gallons sealed the floor. We will do the rest of the electric, hang the sheetrock, do the brickwork and then scrub and seal with a second coat before waxing. Don't get me wrong....the floor is attractive. More so than a slab or a painted slab. We did not achieve the spectacular results that we saw in the "pictures". And, the color was completely different from what we expected. However, notice I didn't say "were led to believe". The company makes it plain as day that there are many, many variables that affect the results. I hope this prompts some to look for more variables, and prepare to adjust the application. A GREAT PRODUCT..... DO YOUR HOMEWORK, AND PREP CAREFULLY.
M**C
Easier to use than you think!
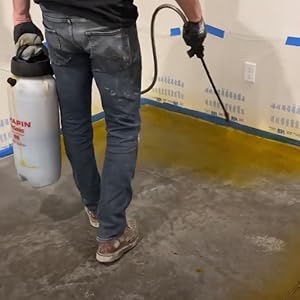
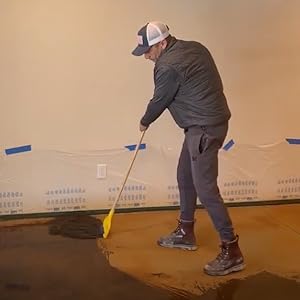
I have now used this stain on three different concrete pads and it's awesome. The first time I used it, I followed the directions to the letter. Lightly wet the concrete then spray the acid with a clean bug sprayer (a pain when it's 75 degrees and sunny and the water evaporates faster than you can spray)... wait a few hours... neutralize the acid with a mixture of ammonia and water... scrub the black residue that comes up during the reaction... clean the concrete.... wait a day or two, then seal it. The color came out great. Looked a little dull like the last photo in this review, but once I sealed it, it looks more like the second to last photo (I did not use a wet-look seal so it doesn't look AS shiny.) The second time I used it, it happened to snow within about an hour of me finishing the spraying. Unable to neutralize the acid, I figured it would just come out darker since it would be sitting on the concrete for longer. It came out THE SAME. After the snow, it rained a little here and there and with the water melting off the concrete and a little rain hitting it, the black residue came off completely on it's own. This saved my back since I didn't have to bug spray the whole thing a second time with the ammonia or manually scrub off the black on my hands and knees. We like a rich orange/rust color so I was happy that the final color is exactly the same as our first pad (the two seconds of concrete touch each other so I was hoping it would come out very similar in color). The THIRD time we've used this acid stain are the photos I've posted here. This time, I was going to work smarter - not harder. It had rained prior to me applying the acid so the pad was already wet. It ended up being a little too wet and when I sprayed, the acid flowed into a couple low spots and pooled, you can kind of see where that happened. For our use, this doesn't bother me. But if you want an even color, make sure your pad doesn't have any spots where there is pooled water. I sprayed the acid and just left it. The first photo is about four hours after I sprayed it (it rained on and off all day). The black residue basically covered the entire pad. I wet the concrete with the hose and tried to scrub it with a shop broom but I was convinced it was stuck on there. When the pad completely dried out, that is the second photo with some white crusty residue. So I decided to wet the pad again (the third photo) to show me how much black residue was left. There wasn't much, so I decided to give it just a little pass over with a shop broom while wet and let it dry out again to see if more came off. It ended up raining the rest of the day and POOF the fourth picture is what I found a few hours later! The fifth picture I just took and is how the pad looks with no sealer and no moisture. Looks dusty but I promise it will have a rich color more like the fourth picture when I put the sealer on. I should have just let the rain wash away the black residue and saved myself some vigorous scrubbing but I doubted myself for a minute. Sorry for this hugely long review but essentially what I'm trying to say is this stuff is WAY easier to use and way harder to mess up than you think!! Just some regular watering after acid staining will save you a lot of trouble.
A**N
Save your money, the product doesnt work
I purchased the colors Mahogany & coffee in hopes of adding some color contrast to our fireplace brick. Our brick is a light "blonde" color, isnt sealed, & has never had anything put on it before so I was very excited when I ordered these stains as the dark colors would have no problem showing up. When they arrived I followed the instuctions however when i poured alittle bit of the Mahogany into a container as the instructions stated i noticed the liquid to be a bright yellow color & the coffee an orangish color. But this was my 1st time ever trying a stain & according to the bottle it will have a chemical reaction w/the brick so thought maybe when that reaction occurs the color will change to the dark brown (coffee) & reddish-brown (Mahogany) color its suppose to be. Well as you can clearly see in the pictures that did not happen. The yellow stayed yellow & the orange stayed orange. I even tried it on a spot of our sidewalk as well as our red landscape brick to see if maybe it just doesnt work on the type of brick our fireplace is. But nope had the same results a weird kind of yellow color. So since i only had them for a few days & clearly within my 30day return window i attempted multiple times to return them for a refund. HOWEVER even though it says they offer a 30day return or exchange when you go through the process of trying to return them a message comes up stating you cannot return or exchange this product due to it being a hazardous chemical. So idky they even have the free return listed when you purchase the product knowing full well you cant return it & get your money back. I was very disappointed as i had high hopes for this product. Id like to think maybe i got a bad batch but i dont see how thats possible when i ordered 2 different colors, that arrived a few days apart and since i couldnt exchange them either theres no way of knowing.
L**R
Worked well for me
Works well. I didn't need full strength. Used it on a three month old slab and diluted it 6 to 1 and got sufficient color to satisfy me...was looking for subtle. In my case a little goes a very long way so don't over purchase because NO RETURNS. I tested dilution rates for color intensity in a closet.
C**I
Excellent Product
This is my 2nd time acid staining my concrete with Concrete Coatings and I highly recommend their products. I used Mahogany and sealed it with their Super Seal 2000 in Matt finish. I also used their ez prep to clean before applying the acid stain. There is no more economical way to finish concrete than this stuff and it is easy to work with but is labor intensive. The masking and preparation is the worst part. Just follow all the instructions to a T. Is you had someone to help with the application of the acid it is a big benefit. I have done both by myself and succeeded. I applied the ez prep cleaner with a sprayer, brushed it in with a deck brush then washed it off with a pressure washer. Then masked surfaces. You need to mask good, especially any adjacent concrete or mortar. I had bricks and masomitebsiding so masked a lot. Also the washoff when you remove it can stain too. I used plastic sheeting to allow it to run off and not down the bricks. You spray the acid on and use an acid brush on a from handle to brush it it. This is where two people would be a big benefit, one spraying and one brushing it in. Make sure to get a sorayerbthat does not have any metal parts, made for this stuff or chemicals. Honestly I bought a chemical sprayer off Amazon for this and it was OK, not great. By contrast I used a small Chapman sprayer to apply the neutralizer and I wish I had used it for the acid. It had a much netter pattern. Depending on how much you apply there may be some runs. You could even brush it in but come back 10-30 minutes later and see runs. I have actually left runs on at times and it adds some unique look to the colors and finish depending on how it runs. It depends on your tastes. You can re brush it in but the most key point I have found with this stuff is VIRTUALLY ALL BRUSH MARKS SHOW UP. It is important to keep this in mind as you are applying and brushing and again where a second person helps. Also due to variances in the concrete you will Find different shades and patterns that are uncontrollable. This is what makes it neat really, just don't expect everything to be uniform like paint. Once applied wait several hours before nutralizing and washing off. I did mine at night and neutralized it the next morning so it was on about 8 hours. I neutralized with ammonia diluted 10:1 in water. Sprayed it on, again brushed it in with a deck brush then hosed it off. Then I used a pressure washer with some Keys Cutter for contrete to wash it clean to prep for sealant. Be careful if you use a pressure washer. It is possible to get it too close and actually take some of the acid stain surface off. I do think it is important to wash this thoroughly, if not with a pressure washer then with a deck brush and hose, after neutralizing. This will still be some residue after neutralizing so important to remove what's not needed before sealing. Then after its clean I sealed it with 2 coats applied with a roller. The sealant dries very quickly and really sets the color off. Frankly it looks very bad before the sealant is applied because it is lighter and has a chalky appearance. The sealant gives it a deeper, richer color. Good luck!
R**Y
Unusual application for stain, it performed "OK".
I had a somewhat unique application for this stain--staining store-bought concrete "X" blocks to approximately match pre-stained pressure treated lumber. I tried spraying on the stain, as recommended, but that was terribly inefficient and uneven, so I set up a dunk line using 5 gallon buckets. First bucket--wash to remove dirt, second bucket--clean water rinse, third bucket-- the stain, and then, in time, the 4th bucket-- the neutralizing wash. This worked pretty well, I did have to dilute the material about 20% with water to get the needed volume. As time went on, the material became more and more dilute, as carryover water from the rinse stage got added to the stain, so I just took a lesson from my darkroom days and extended the dunk time to compensate--worked well enough, seemed like the first blocks got a 20 second dunk, by the end of 20 blocks, they were getting 3 minutes to match the density of stain. By the end, the stain was no barely bubbling, it had been exhausted, probably been neutralized. The color is not quite as dark or as red as I hoped, more orange, but within the range of acceptability. All things considered, it was an OK product for my application, and of course I abused the method of application, although I do say, in the end, there is very little difference between the first and last bricks that I treated, so my methods were sound. I will try sealing tomorrow. If that goes badly, as some have reported, I will modify my review accordingly.
G**P
Easy To Apply
This is the second time using this stain. Application is easy with a pump sprayer. My recent project was a garage apron with a light brushed texture. This absorbed more than the smooth patio that I did years ago so I will be ordering more so that I can reach my desired color. I recommend buying more than you think you'll need, especially if the concrete is textured.
D**Y
Amounts and directions
We are very happy with this Walnut colored acid stain product, and it's the second project we've used it for. This project was large - a 25 x 28 concrete patio with a mag finish, so 700 square feet for the surface and we also sprayed the sides which were 12 - 16 inches high. I'm trying to figure out how to add the pictures of the different stages. I ordered 3 gallons of Walnut color and needed most of it. There was some left over, but 2 gallons would not have been enough. We sprayed with a new/clean 2 gallon weed sprayer and diluted the stain 1:1 with water (1/2 stain, 1/2 water - one gallon of each). The concrete sat for 5 weeks after pouring it before we stained it. First, we cleaned it off well (just dish soap, a hose, and a scrub brush on bird messes). There was no sealant on the concrete. If it were an old patio with oil from a grill we would use TSP or a degreaser to clean it. The first day we sprayed heavily in a circular pattern (watch Youtube videos) and let it dry overnight. After letting it dry overnight we came back the next day and washed off any new bird messes and swept off dirt/grass that got on it. We applied more stain in the areas that we thought were too light. We let this dry overnight and then neutralized the stain. *For neutralizing: We just used 1 cup of ammonia in 2 gallons of water in the sprayer. For a smaller project we had done a couple of years ago, we used a mop and bucket of ammonia water. Because this was on the foundation of the house too (which actually looks really good!), and has sides, we sprayed to get every part neutralized. If you have plants in the area, you may want to mop with a new string mop for this purpose. We then rinsed off the ammonia water with a hose. If you have plants, or are inside, you will want to use a mop. After the patio dried overnight, we sealed the concrete with a roller. Go in one direction for the first layer (watch Youtube videos). This is the stinkiest part, so if you are inside, ventilate well! We let this dry overnight and then cleaned it off again to reseal. We weren't happy with one coat as it bubbled up in some areas and was really light by the cracks. So, we lightly rubbed off the bubbles and sealed again with a roller going in the opposite direction as what we did the first time. We used a disposable chip brush on the cracks and near the house/foundation too. By the end we had used almost 8 gallons of sealer to get the shiny look without any air under it. If your concrete is older, it may not use this much.
Trustpilot
3 weeks ago
2 weeks ago