Desert Online General Trading LLC
Dubai, United Arab Emirates
Desert Online General Trading LLC
Dubai, United Arab Emirates


✨ Step into clarity with Angelus – your soles’ glow-up essential! 👟
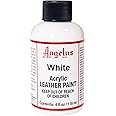
Angelus is a 3.9 fl oz professional-grade rubber sole restorer that removes yellowing and oxidation to restore the original clear or icy look of sneaker soles. Its versatile brush-on formula works on most rubber surfaces, trusted by sneaker enthusiasts for effective, safe, and long-lasting results. Made in the USA with premium ingredients, Angelus delivers expert restoration without expensive services.


| Manufacturer | ANGELUS SHOE POLISH |
| Part Number | 876-04-000 |
| Item Weight | 0.16 ounces |
| Product Dimensions | 1.65 x 1.6 x 4.9 inches |
| Item model number | 876-04-000 |
| Is Discontinued By Manufacturer | No |
| Size | 3.9 Fl Oz (Pack of 1) |
| Color | Clear |
| Finish | Gloss |
| Material | Rubber |
| Item Package Quantity | 1 |
| Number Of Pieces | 1 |
| Special Features | Glow |
| Usage | Interior |
| Batteries Included? | No |
| Batteries Required? | No |
Trustpilot
2 days ago
3 weeks ago