

🚤 Elevate Your Marine Experience!
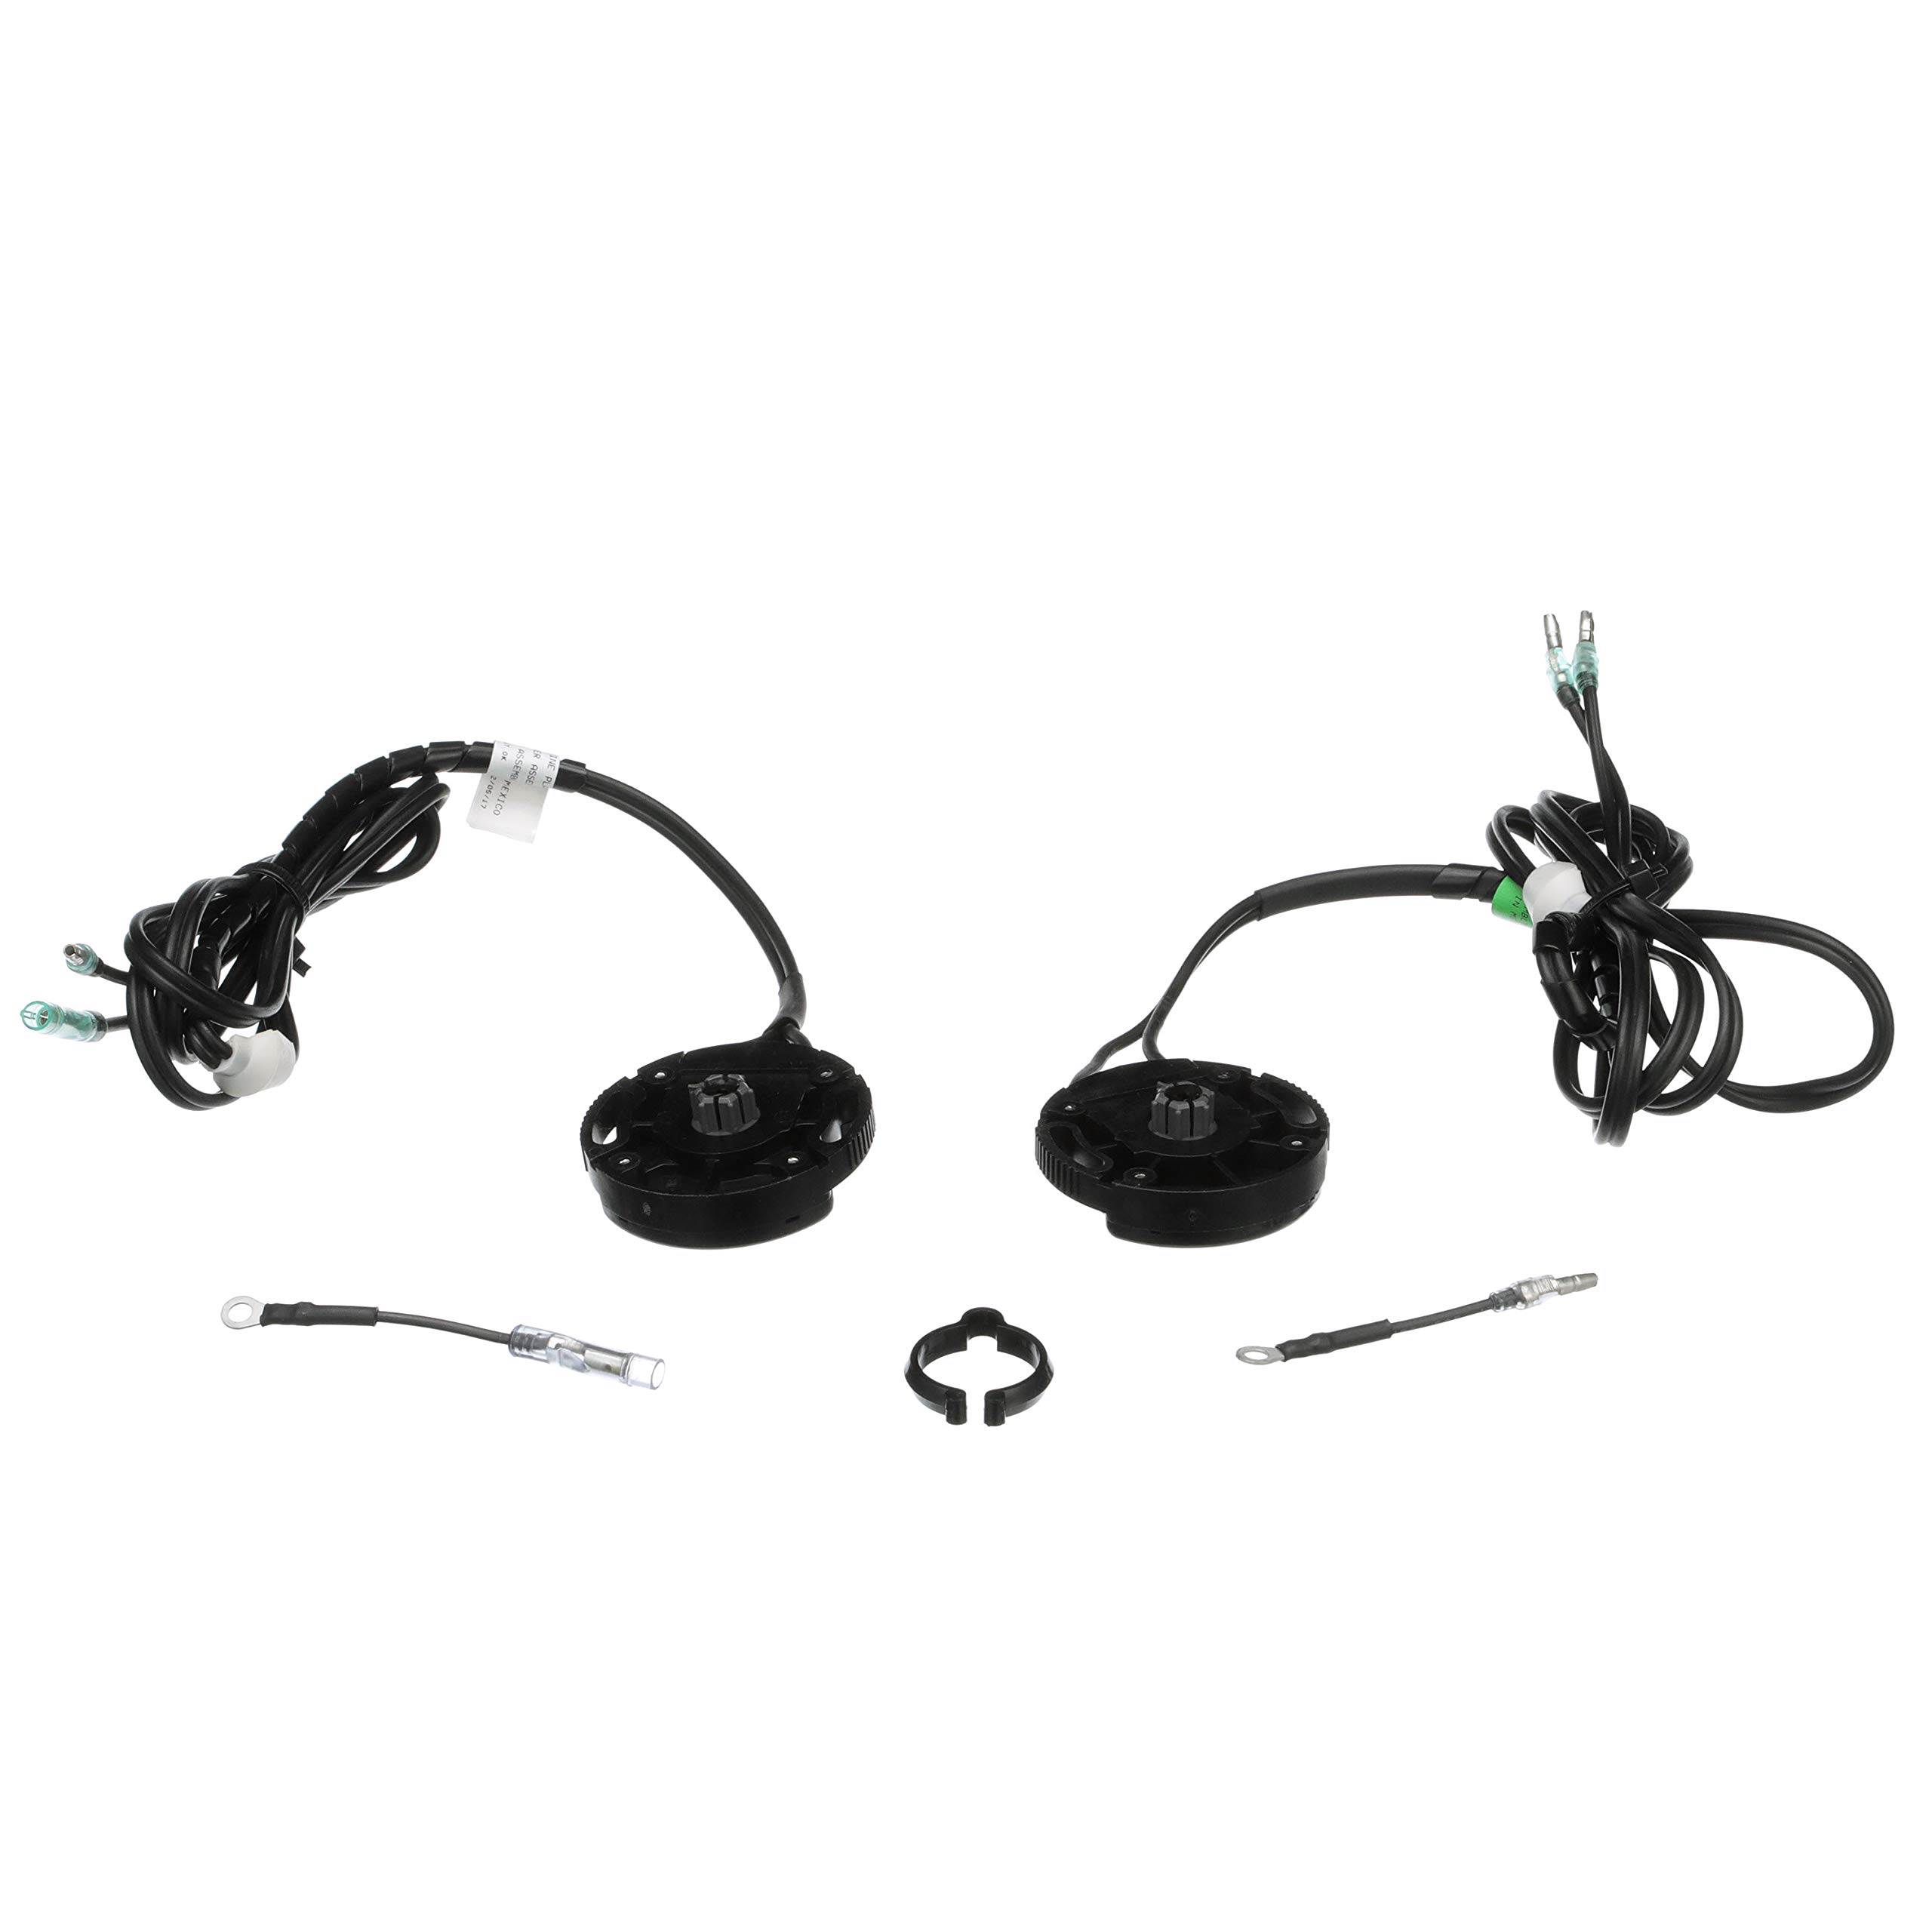
The Quicksilver 805320A03 Stern Drive Power Trim Sender is a high-performance component designed specifically for various MerCruiser stern drive applications. It includes a trim limit switch and wire leads, ensuring easy installation and compatibility with multiple models. Built to meet original equipment manufacturer specifications, this sender enhances the performance of your boat's engine while providing durability and reliability on the water.
| Item Package Dimensions L x W x H | 7.36 x 4.72 x 4.69 inches |
| Package Weight | 0.43 Kilograms |
| Item Dimensions LxWxH | 7.4 x 4.6 x 4.8 inches |
| Item Weight | 14.4 ounces |
| Brand Name | Quicksilver |
| Country of Origin | China |
| Warranty Description | 1 year warranty |
| Model Name | Stern Drive Power Trim Sender 805320A03- For MerCruiser MC-I, R, MR, Alpha One, Alpha One Gen II and Bravo Stern Drives |
| Color | Unspecified |
| Material | Various Materials |
| Suggested Users | Boat Engine Parts and Accessories |
| Number of Items | 1 |
| Manufacturer | Quicksilver |
| Part Number | 805320A03 |
| Included Components | End Product & Information |
| Size | Unspecified |
| Fishing Technique | Spinning, Casting |
K**S
Fit just like the OEM ones
Fit great and work great at 1/2 the price
D**D
Genuine Mercruiser/Quicksilver replacement part!
This part is an exact factory replacement part for the trim/tilt sending units. Great quality.The install is the hard part. I was able to replace mine without removing the outdrive. You will need 1/4” drive “wobble” extensions to reach the wiring harness transom hold down bolt behind the bell housing. 7/16” bolt on the hold down bracket.Turn the steering wheel hard right, outdrive in the fullly down position. Stick the long extension through the clearance between the bell housing and yoke. Then connect the short extension with the socket on the end. This will allow you to reach the hold down bracket bolt.Tips: you’ll need good lighting to see behind the bell housing where the wiring harness goes through the transom.Tie a strong string to one of the harness leads in the engine compartment BEFORE pulling it out the back!Then tie on the new leads, tape them down as small as possible (they’ve got to fit through the hole the harness plug seals, and pull them back through.Tip: feed the senders through their respective sides of the transom assembly before taping the leads together on both sides of the transom plug. You will need to put the hold down bracket on the harness on the wires just behind the plug, then tape the wires together tightly.It is all a very tight fit to work on!It’s a frustratingly hard to do install but it is worth it.Local shops charge several hundred dollars labor for this because they remove the outdrive to do the install.If you are handy and understand the parts you can definitely do this without the outdrive removed. If you are easily frustrated, get a shop to do it for you!
R**N
Perfect
Excellent replacement. Works beautifully
S**.
Want to know the trick?
The Mercruiser manual says that you have to remove the lower unit and the gimbal assembly to do this. Well, this is false. I watched some Youtube videos that show that this can be done with out removing any of the stern drive components. I found that the hardest thing to do after fishing all the wires through the transom is putting the hold down clamp back on because its extremely difficult to get the clamp bolt started (I had almost 2 hours into this feat before i was ready to give up).After smiting all engineers on the planet, I decided to grab my Dremel tool and relieved a small spot on top of the out drive to get my 1/4" drive extension ( not the socket) past the gimbal, slipped the bolt and socket on to the extension and then threaded the said bolt from hell through the clamp and back into the transom and (Don't worry, there is plenty of "meat" here to do this and it wont hurt anything). after i was dont, i took some Semi Gloss Black rattle can Rustoleum and touched up the relieved area. Doing this made the process so much easier...why couldnt the engineers figure this out??? Hope this helps.
D**A
Great product
Merc parts are pricey, yet last the longest and work as advertised.
J**J
Installed fine but not without small issues
Limit switch and trim sender are installed and working, however not without some issues. The limit switch does require to be wired properly. Both wires are male and it was not working properly until i swapped them at the trim motor. The trim sender was not working at all until i opened it up and cleaned excess grease and some green looking substance off the brushes. After the cleaning, it worked fine.Here's a hint for the others that are wrestling with re-installing the bracket that holds the wires in the hull. Have a small child with small hands do it for you. I was able to remove the bolt in the bracket with a swivel joint on the end of a couple of extensions, but getting the bolt back in was impossible with my hand size unless I removed the stern drive and gimble ring per the instructions. Well I didn't want to do all that, so I just had my 11 y/o daughter reach in there and get the bolt started for me. She got 2 or 3 threads engaged and I did the rest with the swivel and extensions! She saved dad a lot of frustration, so I gave her 20 bucks on Amazon to order whatever she wanted!
T**Y
Fit perfectly but a bear to install on Alpha 1 Gen 1 drive.
Gen 1 drives have a plate with two bolts up behind the upper gimbal pivot pin. Unless you're removing the gimbal frame, it's a real challenge to get access to the upper 7/16" bolt. I was successful by using a PROTO combination socket/u-joint. It still wasn't easy but at least I got it done. Hopefully, the insulation on these wire will not fall off like the originals. (The boat is 24 years old.)
A**R
Worked fine on my 1996 IB/Outboard 4.3 Mercruiser.
I was able to use weed wacker line as a snake, and 1/4 inch socket and extensions and "not" pull the out drive. It took an hour or so. Some tape, a second person, and patience; but worked great when installed. Comes with directions for set up just make sure the outdrive is all the way down when setting up. Wires had a double male on one side and a male and female on the other so can't mess up. The notorious trim up doesn't work was fixed and gauge works great now.
Trustpilot
1 week ago
1 month ago