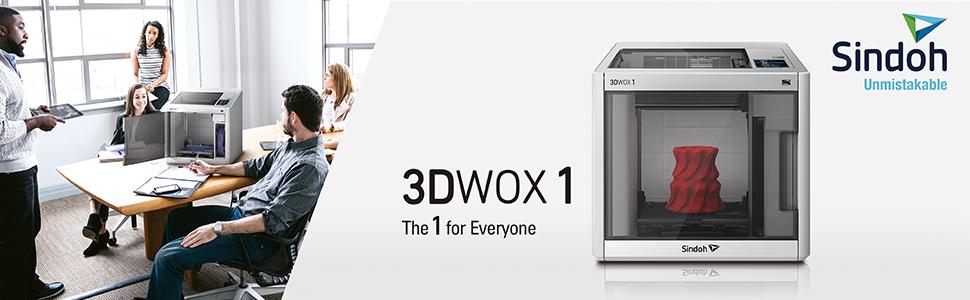
One of the biggest challenges with using reviews to decide/influence a purchase is getting past the "I loved it" or "I hated it" to get to product details relevant to you. After all, I think we're all painfully aware that reviews can be bought and that frankly, some people can never be pleased. This is especially true when the product is 1) expensive, 2) complex, and 3) unfamiliar to you. For me, this printer was all three. I couldn't even begin to tell you how many articles and videos I reviewed to try and get a handle on the various options before I pulled the trigger. This is compounded by the fact that 3D printing is still an industry somewhat in its infancy. Sure, the tech has been around for more than a decade, but for most of that time it was largely the playground of technical enthusiasts. For example, until fairly recently most 3D printing guides still included advice about buying a can of hairspray to make the printing surface sticky enough to hold the filament in place, a technique that has largely been made obsolete by advances in printing surfaces. As an outsider with no real knowledge of 3D printing or plastics, the presence of so many ad-hoc solutions to technical problems was a real red flag. I'm just looking for a reasonably reliable way to print interesting and useful parts.Sindoh designed this printer with people like me in mind. More specifically, they designed it for business/office use, but that group tends to have a lot of overlap. Less flashy features, but trading that flash for increased ease of use, reliability and some increased cost. After using it for several days, I'd say they hit their mark. From never having printed ANYTHING, you can have the printer assembled and kicking out objects in less than 15 minutes, a feature that reviewers will often refer to as "turnkey". It's almost like magic how I was able to pull off some tape, follow a few on-screen prompts to level the printing bed, enter my WiFi password, and kick out objects from Thingiverse that looked like professionally manufactured products. Seriously, I was boring friends and family in no time with pictures and breathless descriptions of how easy it was.But there are some gotchas. Some I know, or think I know, now, and some will remain delightful surprises down the road. But I think I know enough to give some advice to people like me who are considering taking the plunge. Let's start with price. No two ways about it, the 3DWOX1 is pricier than many different models with similar feature sets. It's a fully enclosed, single print nozzle model with a heated bed and a decent if unspectacular processor. You can find equivalent printers for anywhere from $500 to $1000, making this printer a good 50% more expensive than you could find elsewhere. For that price increase you get a touch screen display with a decently designed interface, WiFi (you would be surprised how many printers don't have this), a clever heated magnetic bed design, a HEPA filter, and a fancy micro-chipped filament system. The printer is also pretty quiet in operation, which was less important to me because I used WiFi to put it in an out of the way room, but still appreciated.The advantage of a good interface should be obvious and the WiFi is a nice convenience factor, while the heated bed is nice because the heat helps to produce more reliable prints. Also, the ability to remove the magnetic bed when a print has finished makes it easier to remove the printed objects. The bed is also flexible, usually allowing you to remove the print by flexing it instead of risking damage by using a scraper (though one is also included). The HEPA filter is also a great feature you don't find in nearly enough models as it collects the smell and smoke of melted plastic filament rather than simply exhausting it into your room, which is starting to get some attention as it may be more toxic than people originally thought.But the star feature of the printer is the micro-chipped filament. If you've never investigated 3D printing before, there are dozens of different materials you can use to print and hundreds of manufacturers. Variety is the spice of life and all that, but the hard truth is that different materials have different properties, manufacturing tolerances, temperature ranges, strengths, flexibility, and many other factors, all of which affect your printers ability to create a reliable print. At the cost of variety, Sindoh strongly encourages you to use only their materials, which come in 9 colors of PLA (the most common and popular printing material) and 7 colors of ABS, a harder and less sunlight sensitive filament. The filaments come in 1 kg rolls that you put into a special case along with a microchip which allows the printer to auto-insert the filament into the printers nozzle and tells the printer all of the technical details of the filament so that it can auto-adjust the printers settings to achieve optimal reliability. The chip also tells the printer the color of the filament, allowing you to specify color changes by vertical levels of the object, although I have not actually tested that yet.The printer does have the option of switching to an open (non-Sindoh) material, but if you read the warnings in the guide doing so will likely reduce the lifetime and reliability of the printer and is discouraged by forcing you to go through several menus to switch the entire operating mode of the printer. The bottom line for me is that this printer is not for people who want to experiment with exotic materials, but rather for those who are fine with a few basic colors and materials that will deliver good prints with high reliability.I've printed about a dozen pieces so far and every one had uniformly excellent print quality. Fused Deposition Modeling (FDM) 3D printers like this that build objects by laying down thin layers of melted filament don't build truly smooth surfaces from the side (because the side is actually many different layers stacked on top of each other), but this printer has such thin layers that I had to bring the objects right up close with a light shining on the surface to see the lines. FDM printers have a resolution that is specified by the minimum thickness of each layer, and the 3DWOX1 just qualifies as a high resolution printer with a resolution of 50 microns in the maximum quality "slow" mode. The very best printers I've seen go down to 10 microns; by way of comparison a typical sheet of copy paper is about 50 microns thick. It's worth noting that while 3D printers often specify minimum thickness, which in the x, y, and z coordinate system is the smallest thickness in the z (height) dimension, few if any printers seem to specify resolution in the x and y dimensions, and I don't think it's the same. You see the effects of this the most when an object has a curve in the x y plane; rather than being smooth, it tends to have small blocky ridges where the printer tried to create a smooth slope.But there's a catch to the print quality. Something that I read so many times in reviews that I think it's quite common. And that is that basically, after an amount of time as little as 5 months and as high as 18 months or so, your print quality will suddenly decrease. Bad prints will start cropping up, and the usual maintenance of nozzle cleaning and the like won't help much. Only actually replacing the nozzle component will bring everything back to good as new. So while I wouldn't normally think of a printers internal components as consumables, it seems like in this case they might be. In fact, I bought a spare print bed and nozzle when I bought the printer for just that reason. I'll be using the printer quite heavily, so I'm just planning on replacing those components every 6 to 12 months as needed. This adds to the expense of the printer, but I'm happy to pay if the trade-off is low hassle and high quality, but for the more budget conscious this might be a bigger drawback.Once you have setup the printer and printed the built-in test objects and are looking for things to print, I highly recommend checking out the Thingiverse website, which has literally millions of free objects of every conceivable type for you to download. The objects are packaged in stl files, which are kind of like CAD drawings I think. Before you can actually print them though you'll need to convert them into gcode, which is the language 3D printers actually understand.Gcode is basically the CAD drawing divided up vertically into thin layers with optional supports added. Supports are plastic stands that go from the printing bed up to any part of the model that "hangs" over the bed with nothing below it. They are meant to be snapped off after the print is completed and sanded smooth at the points of the print where they touched, which is usually pretty easy. Converting from stl to gcode is done in a "slicer", a program that reads the stl files and does the computation of dividing it up. There seem to be a multitude of free slicers out there, but one is also included with the printer on the USB drive and for me was often as easy as "open stl"-->click on slicing button-->"save gcode".Speaking of the USB drive, another little quirk of the printer is that Sindoh requires you to use the included 8GB USB drive for loading gcode files onto the printer via USB, so take care not to lose it. Apparently, using a different USB drive can actually void your warranty for some reason, which doesn't feel very reasonable. That said, you still have the option of using WiFi to send files and the included drive has enough capacity to hold many, many gcode files. It also contains the software for Mac and PC computers as well as the manuals, which you should reference for how to perform basic maintenance like nozzle and line cleaning as well as navigating the slicer program.I've attached some pictures of the first objects I printed. The first picture is of three test print objects built into the printer: a button, a bar, and a cell phone stand (the thing with all of the hearts). The next picture is the Flex Dragon, a popular object from Thingiverse. That object is actually three separate objects, the main body and each of the wings, that snap together. The dragon (in high resolution "slow" mode and the default basic settings) took about 24 hours combined. Something interesting about the Flex Dragon is that its flexible movement comes from the fact that each section of the body and wings is connected with a chain link, and that the printer printed the chains as a single self contained object even though they are physically separate components, which blew my mind a little. The Gear Egg, another popular Thingiverse object and my personal favorite of the bunch, took about 15 hours in high resolution as 6 different prints that snap together. Here I did switch the slicer into "advanced" mode, but only to change the fill percentage from the default of 15% to 50% to give the pieces some more heft. You'll notice that I also used multiple colors of PLA to make it look a little more festive. Finally, the stand was done in red PLA and took about a day and also required a lot of support cleanup (also courtesy of Thingiverse).This is getting a little long, so let me just summarize: I am very happy with this printer so far, but I went into it accepting that it was a little restrictive on materials, a little expensive both up front and in maintenance, and is really designed for people looking for a low-hassle way to print objects out of basic materials. Somewhat paradoxically given what I just said, the printer is made by a south Korean company with no US subsidiary, so while they do have 24 hour email support, don't count on it being super helpful or responsive to anything but the larger, more obvious problems and questions. Your best bet to stay happy I think is to use only Sindoh materials with relatively basic settings that have the least chance of creating complications. But for people like me who are brand new to the whole 3D printing concept, it makes for a very gentle introduction into that world.