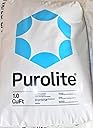
Purolite C-100E Cationic Resin Replacement for Water Softener 1 CuFt Bag Media
Product ID: 66232030
⚡Efficient regeneration
💧Low extractables for pure water
⏱️Fast kinetic performance
Desertcart purchases this item on your behalf and handles shipping, customs, and support to Cyprus.
💧 Soft water, sharp living — upgrade your flow today!
Purolite C-100E is a high-performance cationic resin designed for water softeners, offering efficient regeneration, excellent kinetic performance, and low extractables. Packaged in a 1 cubic foot bag, it supports cleaner, softer water and is highly rated by over 1,000 customers for reliability and effectiveness.
| ASIN | B078PTDFDF |
| Best Sellers Rank | #119,523 in Tools & Home Improvement ( See Top 100 in Tools & Home Improvement ) #86 in Water Softeners |
| Color | resin |
| Customer Reviews | 4.6 4.6 out of 5 stars (1,079) |
| Date First Available | December 29, 2017 |
| Included Components | 1 cu. ft. |
| Item Package Quantity | 1 |
| Item Weight | 49 pounds |
| Item model number | C100E |
| Manufacturer | Purolite |
| Part Number | Purolite-1Cuft |
| Product Dimensions | 18 x 14 x 8 inches |
D**Y
This resin really works
I was able to completely disassemble, thoroughly clean, and change the resin in my 12-yo Coolligan water softener in ~5 hours from A to Z. Required tools and materials: 1. The big blue funnel + a table spoon or whatever scoop you find 2. 1 bag of the resin being reviewed (1 cu ft) 3. 1 bag of gravel (15lbs) for water softeners. DO NOT FORGET TO WASH IT WITH FRESH CLEAN WATER before using! I do not recommend saving a few bucks and washing the old one, the time costs more. 4. Direct hands (TM) driver. Steps I did: 1. Closed water line to the water softener 2. Disconnected the resin tank, the salt tank and unscrewed the head from the resin tank 2a. Removed the inlet/outlet pipe from the tank (it's the only pipe inside the resin tank) 3. Drained as much water as possible using silicone tubes (my tank was dug ~2ft deep), this tank filled is heavy as my freaking life, otherwise 4. Dropped some large cloth to drain water, resin, and gravel (an old linen sheet that was used by my ex worked great!). You do not want to reuse the old gravel, just like you don't want to use sheets that were used with your ex:) 5. Thoroughly wash the resin tank, the salt tank, the pipe, and the head, i.e. everything that is possible to reach and clean 6. Sealed the top of the inlet/outlet pipe with painter's tape (to prevent particles getting in) 7. Inserted the tube vertically, centered and put the new _washed_ gravel in 8. Using a blue funnel for resing, patience, and time, shove the resin beads back into the tank 9. Assembled everything back, and put water back on. 10. ??? PROFIT!!! You'll notice that the water got softer, if: a. objective measurements say so b. dishwasher delivers better results (no white spots, crystal-clear glasses) c. harder to wash soap away while showering I did not experience any odors or bad smells, if only very little right after I changed the resin, it had gone in a few days completely. But I bet, I would never have noticed it if I hadn't known that I changed something in my system. Yes, this product is great. Yes, I spent ~5-6 hours of my life. Yes, I got satisfaction while working on this project. And yes, I saved about $1500, paying about 150-200 total. I highly recommend this product and the brand in particular.
B**N
Best way to open bag
This was my first time "re-bedding" a water-softener, so after watching all the "how-to" videos I could stomach, when I got this bag of replacement resin my first thought was "holy smokes this box is heavy" and my second thought later on was "how do I open this bag so it doesn't spill everywhere?" I finally decided to just leave it on its side in the box, and then I carefully cut a flap out of the plastic side of the bag (with a box-cutter) and folded it over to reveal the resin, which is very much like the consistency of damp sand. (Note the inch or so of border around the flap opening; this is to keep the resin from spilling over the sides while you scoop it out.) This worked incredibly well, and by using the blue plastic tumbler that I already had as a scoop and the (accidentally) matching blue funnel that I ordered (which really did help), I was able to transfer all the new resin into the tank with no spillage whatsoever. The resin itself must be good, because after getting everything back together and regenerating, I'm now measuring zero grains per gallon of hardness, just as it should be. (I should mention that I cleaned out the brine tank after doing the resin, which sorely needed it (I didn't have a salt-bridge as much as a salt-tectonic-plate), and after everything was back together I gave the brine a full day to reach maximum strength before doing a regeneration. Even after regeneration, I had to run quite a bit of water through all of my pipes before getting to the fully soft stuff, so don't rush to judgement; it's surprising how much water-mixing goes on in your pipes, so open them all up at the same time and flush out all the hard stuff before measuring your results at the faucet closest to the softener!) Overall this was $2000 less than getting a whole new softener. Yeah, it took about 4 hours for replacing the resin (I work slowly and take breaks) and probably a couple more for the brine tank, but all things considered, for two grand I'd do this job myself again in a heartbeat. Definitely worth it. Great resin, great price, great result. Can highly recommend.
D**S
soft water again
My 3 year old Morton water softener was good the first year, then gradually got to the point no matter how many times it was cycled and replaced parts, it did not produce any soft water anymore. I was going to replace the entire water softener but decided to try replacing the resin beads inside the tank. If you have a wet shop vac and handy repairing things, this is actually an easy job. The softener was 34k capacity and one bag of Purolite filled it up with some left over. After replacing the resin, it ran the nearest sink for 10 minutes- water ran clean after a few minutes. Some people state a wierd taste but I really did not notice anything, it took a few days of use and now its clean, nice soft water again.
P**E
Great Water Softener Replacement Resin
I recently purchased the Purolite resin and here are my thoughts: 1. Happy that the Purolite bag was shipped in cardboard box so no resin would escape and make the bag messy. 2. Compared to my old resin I noticed this resin had a vibrant brown mustard color which visibly looked much better. 3. I would recommend getting the big blue funnel and even a big scoop as it made the job much easier when filling the softener vessel. 4. I saw some bad reviews indicating that the water smelled after replacing the resin. I was curious so I did verify this with a close water faucet (on cold water only) However, after doing a regeneration (which included an extra rinse cycle) I noticed this went away completely and very quickly. 5. I bought a water hardness test (using drops not strips) and I was originally concerned that the replacement resin was not as good as the original as the water hardness started to climb to about 5ppm about a week before the regeneration would normally occur. I observed this for the first 2 regeneration cycles however it now appears that my resin is working as expected as it's now reading 0ppm after 14 days. I only tested this on cold water and my untreated water reads 170 ppm (without running through the softener). Also, our water consumption has been pretty consistent through all the regeneration cycles when testing. Therefore, it appears that there may be a "break in" period for the resin or the resin beads didn't get completely saturated during the first few regeneration cycles. Overall, I think replacing the resin is much better than purchasing a whole new system. Hope this helps!
T**P
Does the job but presence of extremely fine resin particles caused some initial annoyance.
I was initially very pleased with this resin. My first time to replace resin in a softener. Following numerous online videos, removing the old resin, cleaning and replacing the resin with this product went smoothly. However, a coupe of days later I found ultra fine particles of the resin had clogged my washing machine inlet screens. Now, after a couple of months and several cleanings of the screens, the fines seem to be all washed out and performance is fine.
E**Y
Perfect
Replaced the resin in my 17-year-old Fleck unit. Now, the house water is very soft. Google instructions on how to shut off the water, unscrew the valve from the soft water unit, etc. It was my first time, and it was easy. Be careful as the resin beads are like miniature ball bearings. I actually spent more time vacuuming my garage floor than doing the job. Unscrewing the top was very easy, as the unit is still filled with water/resin and fairly heavy. I stuck a rubber hose into the tank and siphoned off as much water as I could to lighten the tank, then tilted it to dump the rest of the water/resin into a bucket to dispose, then laid the tank on its side and pressure washed the inside with a garden hose. Probably overkill, but it was a convenient time to do so. I asked a neighbor to hold the tank as I screwed on the valve head after changing out the resin. Be sure to apply a thin coating of food-grade silicone grease to the O-ring, similar to what you would do when you put on a new oil filter during an oil change. It doesn't take much, just a very light coating. I actually only used about 90% of the resin in the bag, so the amount supplied was generous. Note: Changing the resin has no effect on TDS, so don't use a TDS meter to check out your work! You need to use water hardness test strips, which are very inexpensive. Keep the strips sealed until you use them.
E**E
Premium quality
My Kenmore 300 was on its last lap, the rinser tube came lose inside the resin tank and salt water would flow from our faucets for an hour and then only hard water. After I installed an Aquasure Fortitude2 triple filter (catches iron) on the main line, I proceeded to take the unit apart, washed out the salt tank (50lb of old dirt and stagnant salt at bottom), siliconed the top diffuser into the rinser tube (making sure top firmly contacts the bottom of valve), replaced seals, and Ego wet vacuumed out the old resin bed, cleaned tank then filled up to 3/4 of height using about 80% of the 1 cu ft Purolite bag. OMG, within 48h much needed foam galore, OH water went down from 255 to 0. TIPS: 1. Put a 3" tube into the feeding opening and duct tape it to edge, use a wide funnel, and patience, climb atop a small ladder so your arms don't tire, and keep milking the resin beads. 2. WET THE RESIN BED FIRST, i.e. avoid trying to forcibly push the rinser tube or you could fracture the bottom diffuser (beads in house water), instead pour water and float the beads first shaking it with a stick, the rinser tube will now penetrate with ease to allow a good seal with valve on top. Sigh relief: Paid $140 to save $1000 (was going to get a Clack SW1 valve one if repair failed).
D**N
8yr old softener is functioning normally again after resin replacement
First time I repaired a water softener. Our 8 year old whirlpool water softener was previously restricting water pressure into the house and no longer softening water. After watching some videos, disassembly of water softener was relatively easy and replacement of resin was not difficult either. Water softener is now softening water and water pressure is normal. I will continue monitor, but 2 weeks later resin replacement was worth it vs replacing the entire water softener.
S**N
Worked as expected
Worked exactly as expected and the water was soft the same day after the first recharge cycle
D**C
Parfair
Transaction parfaite, relation avec vendeur parfait. Le produit est de très bonne qualité, mon adoucisseur est reparti pour 10 ans
M**E
Resin worked
As advertised, system refilled, all systems worked great.
D**T
Le descriptif
Très bon produit livraison très rapide tout est ok
D**E
Conforme, produit technique
Conforme à mes attentes, ras, produit technique
Trustpilot
2 weeks ago
2 weeks ago