


🚀 Elevate your drive—stand out with precision and power!
The Maxracing 1.5" Leveling Lift Kit is a premium CNC-machined aluminum upgrade designed to raise the front of compatible 2007-2024 GM trucks by 1.5 inches. It installs easily in under 2 hours without strut disassembly, maintains factory ride quality, and enhances ground clearance for a balanced, aggressive look. Compatible with factory steel lower control arms, this kit excludes select Denali, TrailBoss, AT4, MagneRide, and Classic models.


| ASIN | B07WLSG517 |
| Auto Part Position | Front |
| Brand Name | Maxracing |
| Customer Reviews | 4.6 4.6 out of 5 stars (464) |
| Included Components | Front Spacer, Installation Guide, Installation Hardware |
| Item Weight | 34.7 Ounces |
| Manufacturer | Maxracing |
| Material Type | Aluminium |
| Maximum Lifting Height | 1.5 Inches |
| UPC | 717066149283 |
| Unit Count | 1.0 count |
R**Y
This is a really good lift kit. Product came with all of tue necessary hardware. Installed it myself in an hour. Lift my truck as advertised. Quality product. We will see how long it lasts.
C**N
Soulever l'avant de mon nouveau GMC sierra 2024, bon produit et de bonne qualité, le point négatif sont seulement les boulons fournis avec le kit qui sont de grade de 8.8 , ils auraient fallut qu'ils soient de grade 10.9 mais font le travail quand-même
L**N
2024 GMC Sierra 1500 SLT Duramax X31. I used the 1.5" kit as I figured it would give a little more clearance for the cv shaft boots, these new T1 (2019 later) platform trucks don't have as much front droop as the previous GMT platform. First things first, mark your headlight positions with some masking tape ( mine was at about 25' away on garage wall) get you some 10mm bolts that are 10.9 instead of the 8.8 they send, you can use the nuts (make sure you get same pitch bolts) and washers, I pulled my truck up on ramps to drop the engine skid plate because it covers part of the front cross member. Down off the ramps, disconnected the negative battery cable (instead of messing with the wiring harness on the EPS unit), I figured its powered down so no issues. Jacked up with floor jack on front cross member, put 4 ton jack stands under the sway bar mount brackets let it down then put some pressure back on the floor jack. Tires off, took off the wheel speed sensor cable, tie rod ends off (pass thru ratchet makes it easier to take these and the sway bar mount bolts off and back on) even though this truck only has 800 miles on it the sway bar mount bolts spun with an impact wrench. I have a motorcycle jack which i put under the rotor to help support the weight when i dropped the top a arm and shock mount bolts. If you have a pry bar you can easily align and put the new FRONT shock mount bolts in without loosening the top strut bolts, once those are in the rears will pretty much align themselves with no issues. You will need to swing the a arm over quite a bit to get the new REAR bolts in the shock mount past the drive axle shaft ( Also did not take the drive axle nut off just be careful how you support the unit with the top a arm disconnected). Put everything back together, drove it about 5 miles to settle the front end, adjusted the headlights down (previously marked before project start). My end measurements were front 38" , rear 38-7/16", was just shy of a full 1-1/2" lift. No change in ride quality, doubt will have the front end aligned, I have done 2 previous GMC 1500's a 2015 and a 2018 and did not have them aligned and never had any issues, also done a 2008 and 2015 2500 HD's with the overclocked keys and transfer case spacers, the 2008 had the alignment check done, was not off far enough to even bother. Happy wrenching and be careful, you can hurt yourself if you don't have the proper equipment (using a floor jack with no jack stands, inadequate capacity floor jack, etc, etc).
T**R
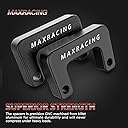
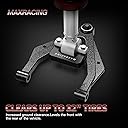
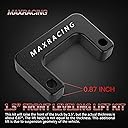
1.5" spacer . lifts truck just enough to take out the overkill rake. still leaves 1.5" rake so not over lifted /perfectly level which i dislike that look. steering is slightly different due to the lift/extension but barely noticeable. suspension seems slightly stiffer but expected as you are putting a little stress on it from the spacer.again nothing major. still rides and drives 95% the same as before maybe 99%. the install was pretty simple if you keep it simple. spent one day trying to loosen all the stabilizer bar and disconnect the upper ball joint ect as instructions suggest. could not get the upper ball joint to disconnect.so put everything back together with no install. few days later decided to im getting it done . the only reason you need to disconnect the ball joint is because the 4WD axle goes right over the bolt hole. so the factory shock/strut bolt is3" the new bolt is 3 1/4" , not a big difference.you are supposed to install bolts pointing down , reason for removing ball joint to allow bolt go through hole facing down, but logic tells you that factory bolts point up(install from bottom point up) so why wouldnt a 1/4 more bolt fit? so i installed bolts up ,tightened correctly, and yes its close to the axle rod but not much closer than it already was with factory bolt. i tppk it around the neighborhood hit some speedbumps ect and figured if it hit the axle then i will re do the install with bolts down. no problems whatsoever , no rubbing anything. have hit the freeway cautiously to make sure , no problems.. so although i agree maybe the bolts should be pointing down to give max clearance, i dont feel its necessary , at least for the 1.5" spacer with the 3 1/4 inch bolt. anything bigger i think is mandatory to install bolts facing down specifically on the 4WD . you will need a prybar or help to push down on the suspension to get the spacer installed under the shock .not necessary to loosen any other bolts besides the 2 shock bolts from control arm. took about 25 minutes each side including time to remove the wheels. hope it helps
K**M
Blocks are good but hardware is lacking in quality and grade. I used these temporarily for a few months and the hardware didn’t instill confidence when I took them back off. I torqued everything to stock specs when I installed them and checked torque periodically.
Trustpilot
2 weeks ago
1 day ago